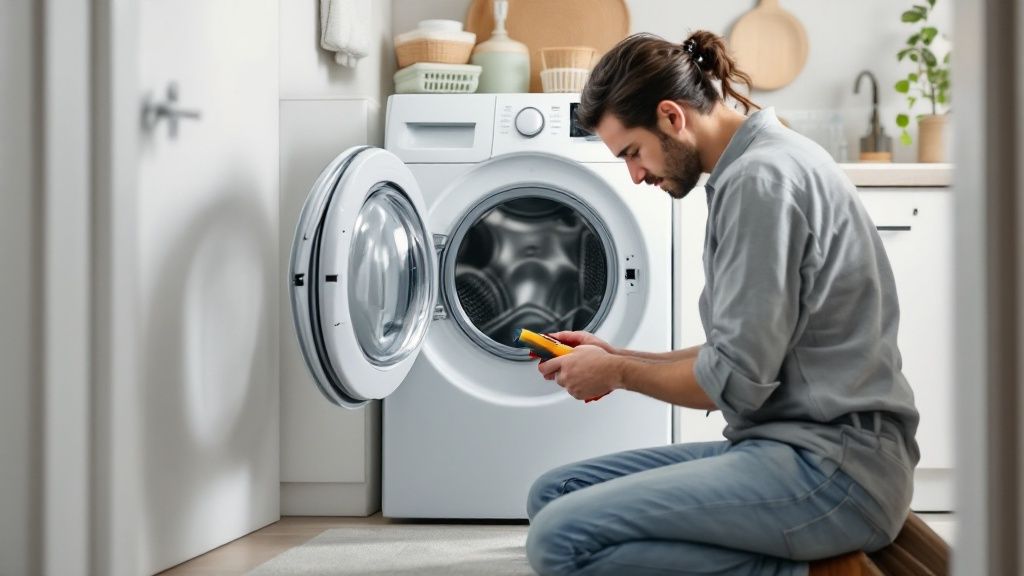
When your dryer is tumbling away but the clothes are still damp after a full cycle, you're almost always dealing with one of three culprits: the heating element, the power supply, or the airflow. Before you start thinking about a costly replacement, these are the exact places to start your investigation, whether you're in Frisco, McKinney, or anywhere in North Dallas.
Your Quick Diagnostic Checklist for a Cold Dryer in North Dallas
A dryer that spins without heat is a frustratingly common problem, but the fix is often simpler than you'd expect. Before you even think about pulling the machine away from the wall, a quick check of the basics can often solve the mystery and save you a service call. Think of this as the five-minute triage for your laundry room.
First things first, check the settings. It sounds almost too simple, but it happens all the time. Cycles like "Fluff Air" or "Tumble Dry No Heat" are designed to run without heat. It's easy to accidentally select one in a rush, so always double-check that you've chosen a heated cycle like "Timed Dry" or "Automatic Dry."
Initial Power and Settings Check
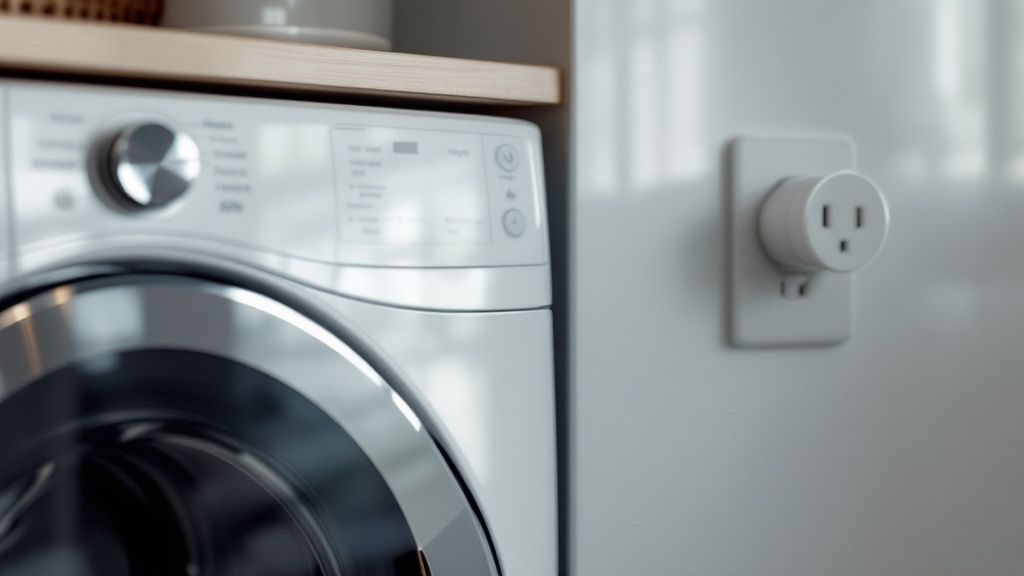
Another very common issue, especially with electric dryers, is a partially tripped circuit breaker. Your electric dryer is a power-hungry appliance that actually uses two circuit breakers. One 120-volt circuit powers the motor that tumbles the drum and runs the controls. The other 120-volt circuit powers the heating element. When combined, they provide the 240 volts needed to generate heat.
If only the breaker for the heating element trips, the dryer will still turn on and spin perfectly fine—it just won't get warm.
Key Takeaway: If your dryer tumbles but won't heat, head straight to your home's circuit breaker panel. Find the two breakers labeled for the dryer, flip them all the way off, and then firmly back on. This ensures they are fully reset.
Power supply problems are a surprisingly frequent cause of heating failures. In my experience, I'd say up to 15-20% of "no heat" calls come down to a tripped breaker or a similar voltage supply issue. The heating element simply isn't getting the juice it needs to work. You can find more detail on these kinds of electrical faults from the appliance repair pros at Mr. Appliance.
This infographic breaks down the top three reasons your dryer has likely gone cold.
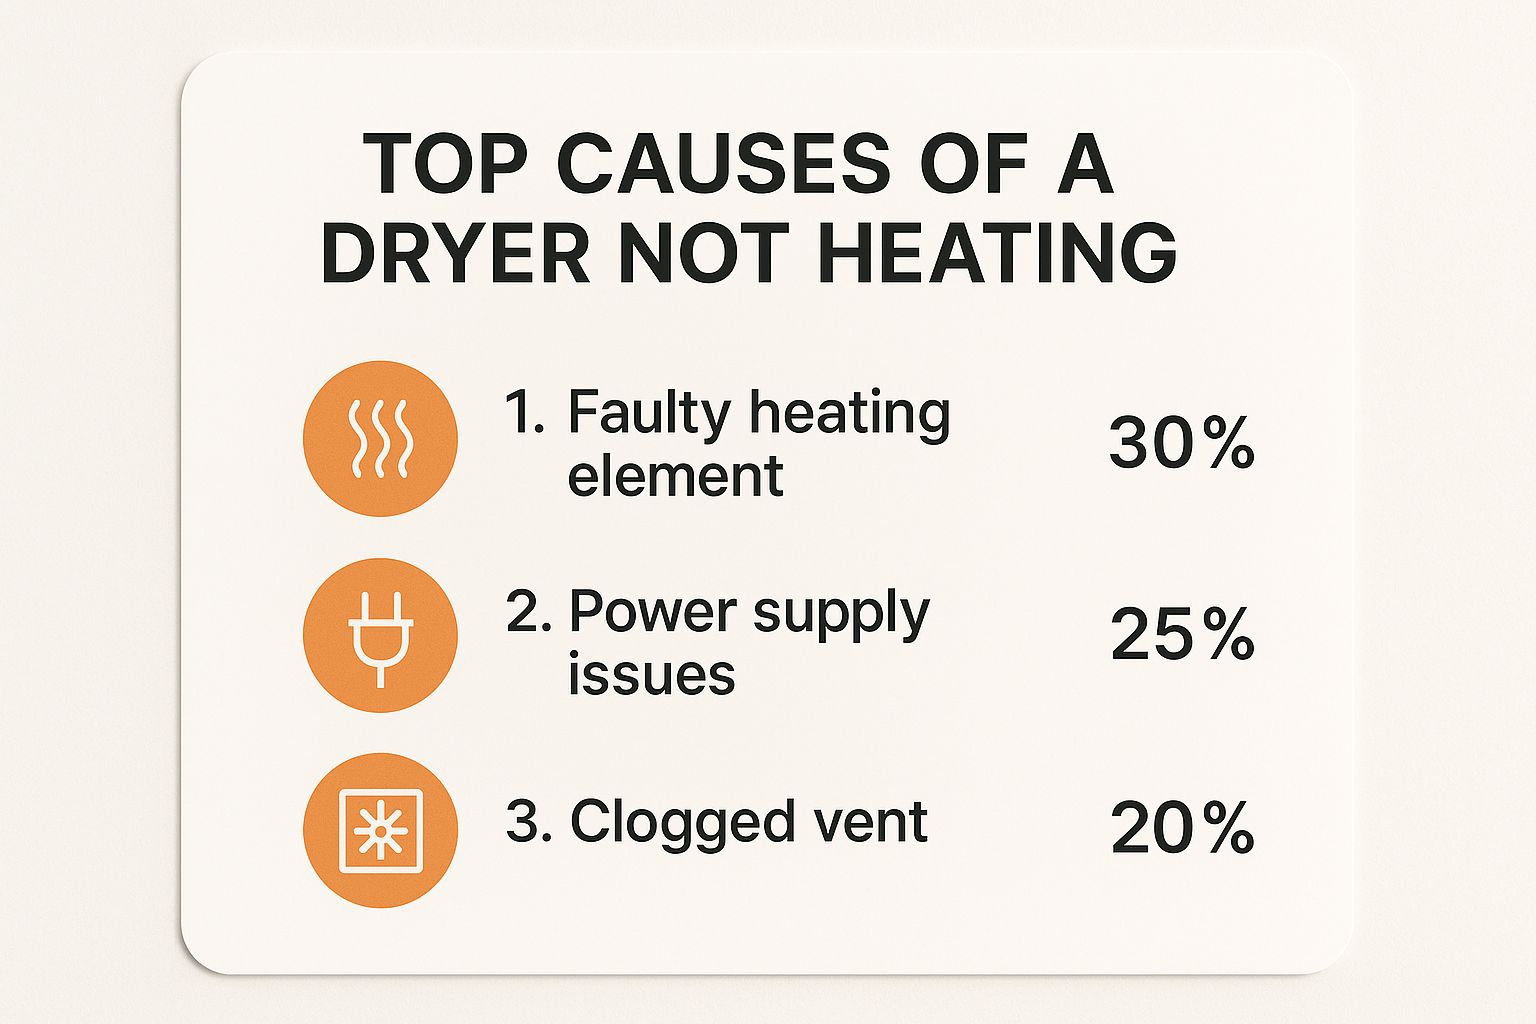
As you can see, actual component failures and basic electrical issues are far more common than a fried control board. Knowing this helps you focus your troubleshooting where it’s most likely to pay off. It’s a lot like fixing other home appliances; once you know the common failure points, the solution is often straightforward. In fact, our guide on troubleshooting your ice maker follows a similar, step-by-step logic.
To make things even clearer, here’s a quick-glance table of the most common issues you'll encounter.
Common Reasons Your Dryer Isn't Heating
| Problem Area | Common Symptoms | Typical Solution | DIY Difficulty |
|---|---|---|---|
| Power Supply | Dryer tumbles but produces no heat at all. | Reset the two-pole circuit breaker. | Easy |
| Clogged Vent | Clothes take very long to dry; top of the dryer is hot. | Clean the lint screen, exhaust duct, and outside vent. | Easy to Moderate |
| Heating Element | Dryer runs, but air remains cold. | Test for continuity and replace if faulty. | Moderate to Hard |
| Thermal Fuse | Dryer won't start at all or stops heating mid-cycle. | Test for continuity; replace if blown (and find the root cause). | Moderate |
This table should help you quickly pinpoint what might be going on before you start taking things apart.
Solving Airflow Issues: The Hidden Culprit
Before you start tearing apart your dryer or pricing out new heating elements, let’s talk about the single most common reason a dryer stops heating: airflow. It's the problem I see most often, and thankfully, it's usually the easiest to fix.
Modern dryers are built with a whole suite of safety features designed to prevent fires. When the airflow gets blocked by lint, the inside of your dryer gets dangerously hot. This triggers a safety switch—usually a high-limit thermostat—to cut power to the heating element. So, the dryer isn't broken; it's doing its job and protecting your home.
This isn't just a minor inconvenience that leaves you with damp clothes. Clogged vents are a serious safety hazard. In fact, restricted airflow is the second leading cause of dryers failing to heat, right behind a blown thermal fuse, and it accounts for roughly 25% of all heating-related repair calls. When hot, moist air can't escape, the system overheats, and the dryer shuts down the heat. You can read more about how major brands like Maytag explain these common dryer issues on their own sites.
Identifying the Telltale Signs of a Blockage
So, how can you tell if your dryer is suffocating? It’ll usually give you some pretty clear clues that it's struggling to breathe. Catching these early can save you a lot of time, money, and frustration.
Keep an eye out for these classic symptoms:
- Clothes take forever to dry. If a normal 60-minute cycle isn't cutting it anymore, that's a huge red flag. It means hot air isn't circulating effectively.
- The top of the dryer gets really hot. The exterior of your dryer shouldn't be too hot to touch. If it is, that's a sure sign that heat is trapped inside.
- You notice a faint burning smell. This is often the smell of lint getting scorched by the heating element. It’s a serious warning that you need to act fast.
- Lint is building up outside. Take a walk outside and look at the vent cap. If you see lint stuck to the flap or scattered around the opening, your vent line is definitely backed up.
Your Complete Vent System Cleaning Guide
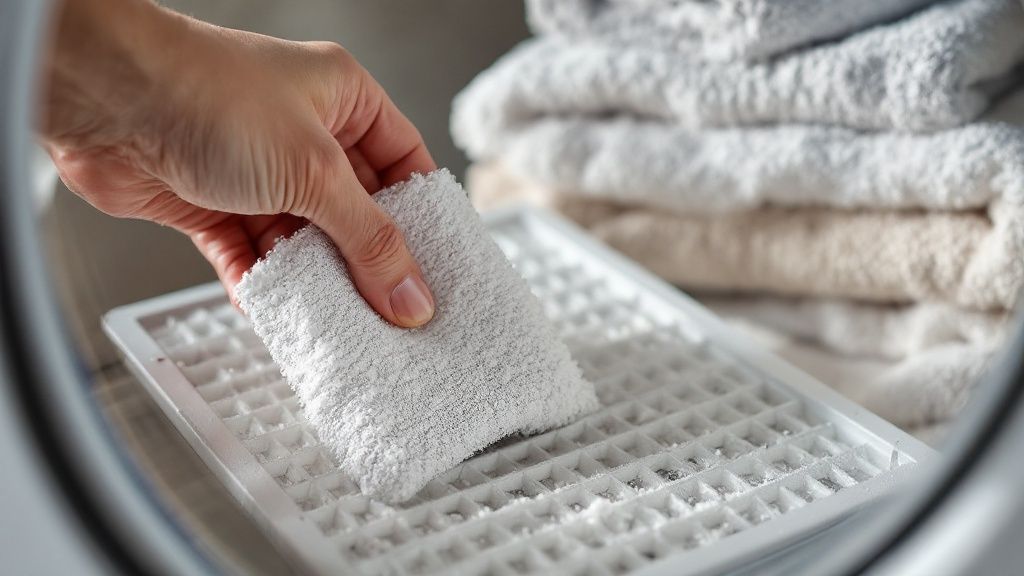
If any of that sounds familiar, it's time to give your entire exhaust system a deep clean. This is way more than just cleaning the lint trap after each load—we’re talking about the whole path from the back of your dryer to the outside world.
Pro Tip: I recommend cleaning your dryer vent twice a year, especially if you have a large family or pets. Set a reminder on your phone for spring and fall. It’s the best way to keep your dryer running safely and efficiently.
First things first, unplug the dryer from the wall. Safety is paramount. Gently pull the machine away from the wall so you can get behind it. Disconnect the flexible vent hose from both the dryer and the wall connection.
You'll probably be shocked at how much lint is caked inside. Use a vacuum with a hose attachment or a specialized dryer vent brush to clean out the entire hose. Then, head outside and make sure the exterior vent cap is clear of lint, leaves, or even birds' nests. The flap should move freely.
Testing Your Dryer's Heating Element or Igniter
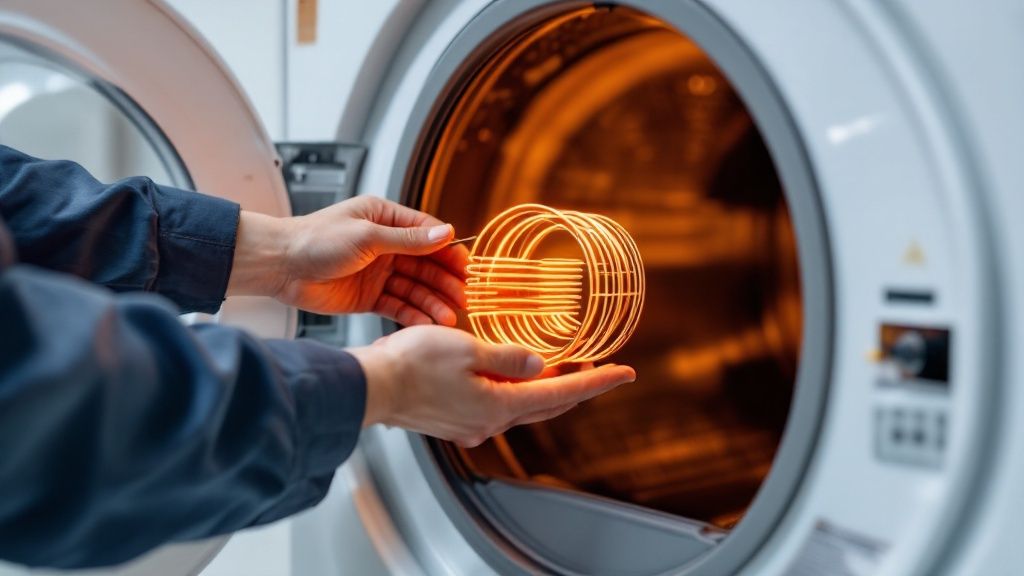
So, you've confirmed you have solid power and the vents are totally clear, but your clothes are still coming out damp. Now it's time to dig a little deeper. When a dryer tumbles just fine but never gets warm, the culprit is almost always the part that actually creates the heat.
This is where the path splits depending on what kind of dryer you have. In an electric dryer, we’re talking about the heating element. In a gas model, it’s the igniter and gas valve assembly. They do the same job but in very different ways.
A busted heating element is one of the most common reasons an electric dryer stops heating—it’s probably the top reason for repair calls we get from homeowners in Plano and McKinney. The element is just a coil of wire that glows red hot to heat the air, but over time, that constant stress can cause it to break. In fact, industry data suggests about 30-40% of electric dryer heating issues are tied directly to a failed element. You can find more details on common dryer failures from the team at Spencer's TV & Appliance.
Safely Accessing and Testing the Components
Let's get one thing straight before you even pick up a tool: safety comes first. Completely unplug the dryer from the wall. No exceptions. If you have a gas dryer, you also need to shut off the gas supply line. This isn't a suggestion—it's a must.
You’ll need a few things for this job:
- A multimeter (for testing electrical continuity)
- A nut driver or screwdriver set
- A good pair of gloves
To get to these parts, you'll need to remove either the front or back panel of your dryer. A quick search for your model number on YouTube can be a lifesaver here, showing you exactly which screws to remove.
Once you're inside, you’re looking for a metal canister that houses the heating element (on electric models). For gas dryers, the igniter is a small, brittle ceramic part usually found near the gas burner tube.
How to Test for Continuity
This is what the multimeter is for. You'll want to set it to the continuity setting—it usually has an icon that looks like sound waves. A successful continuity test tells you that electricity can flow all the way through a component without a break.
For an Electric Dryer's Heating Element
First, just give the element a good look. Sometimes, a break in the coil is obvious. If you don't see anything, disconnect the two wires attached to the element's terminals. Then, touch one probe from your multimeter to each terminal.
If the multimeter beeps or gives you a reading close to zero, you have a complete circuit. The element is probably fine. If you get silence and the display doesn't change, the electrical path is broken. The element is bad and needs to be replaced.
For a Gas Dryer's Igniter
The test is very similar. Carefully unplug the wires connected to the igniter. Touch a multimeter probe to each of the igniter’s two wire leads. A healthy igniter will show a resistance reading, usually somewhere between 50 and 400 ohms. If you get an "OL" (over limit) or infinite reading, the igniter has failed.
For a handy homeowner in Frisco or Celina, swapping out a heating element or igniter is a totally achievable DIY fix that can save you a good chunk of money. But if you’re not comfortable poking around your dryer's wiring, there's no shame in calling a professional. It’s always better to be safe than sorry.
Checking Your Dryer's Fuses and Thermostats
https://www.youtube.com/embed/3nicyh6EUHc
If you’ve confirmed the heating element is good but your clothes are still coming out cold and damp, the next place to look is at the dryer's safety components. Your dryer has a few small but critical parts—the thermal fuse and a couple of thermostats—that serve as its bodyguards. Their entire job is to shut down the heating circuit if things get dangerously hot, which usually happens because of the airflow issues we talked about earlier.
Think of them as little sentinels. They are designed to fail open, or "blow," to prevent a catastrophic failure like a fire. A blown thermal fuse is easily one of the most common no-heat issues we see with dryers, and thankfully, it's often a quick and inexpensive fix for homeowners.
Locating and Testing Dryer Safety Fuses
First things first, and this is non-negotiable: unplug your dryer from the wall. Safety is everything here. These components are typically mounted on the heating element housing or near the blower wheel housing. You'll need to get the back panel off to see what you're doing. Once you do, you should spot several small, often plastic or ceramic-looking, parts with wires attached.
Here’s a quick rundown of what you’re looking for:
- Thermal Fuse: This is a one-and-done safety device. If it blows from overheating, it's toast and must be replaced. It usually looks like a small, white plastic piece.
- High-Limit Thermostat: This part keeps an eye on the maximum temperature. If the dryer gets too hot, it cuts power. It's designed to reset itself, but if it fails for good, the heat won't come on.
- Cycling Thermostat: This thermostat is the workhorse that manages the temperature during the cycle, kicking the heat on and off to keep things just right. When it goes bad, it can prevent the heat from ever starting.
A Word of Caution: A blown thermal fuse is a symptom, not the root problem. It almost always blows because a clogged vent caused the dryer to overheat. If you just replace the fuse without thoroughly cleaning your vent system from the dryer to the outside, the new fuse will blow again in no time.
To test these parts, grab a multimeter and set it to the continuity setting (the one that beeps). You’ll need to disconnect the wires from the component you're testing. My advice? Do them one at a time so you don't mix up the wiring. Touch one probe to each terminal on the part.
A beep or a reading near zero means you have a complete circuit. The part is good!
If you get silence or your meter reads "OL" (open line), there's no electrical path. That component has failed and needs to be replaced. This simple dryer not heating troubleshooting test is a fantastic way to pinpoint the exact broken part and get your laundry routine back on schedule.
Knowing When It's Time to Call a Professional
Tackling a dryer repair yourself can be a great way to save a few bucks, and honestly, it feels pretty good to fix something with your own two hands. But there's a fine line between a satisfying DIY win and a project that spirals into a costly, dangerous mess. Knowing your limits is key.
If you’ve gone through the usual suspects—lint trap, vent hose, circuit breaker—and your dryer is still blowing cold air, it’s probably time to put down the tools and pick up the phone. Some problems just aren't meant for a weekend warrior, especially when you’re dealing with high-voltage electricity or natural gas.
Red Flags That Mean "Call a Pro Now" in Allen, TX
I've seen it all, and certain symptoms are immediate red flags that the problem is beyond a simple fix. If you run into any of these, don't try to push through. Just make the call.
It's time for professional help when:
- You smell gas. If you have a gas dryer, this is non-negotiable. Shut off the gas valve to the dryer immediately and call for service. Your safety comes first.
- You suspect the main control board is fried. This is the dryer's computer. Without the right diagnostic tools, you're just guessing, and it's an expensive part to guess wrong on.
- You see burnt or frayed wires. This is a serious fire hazard. An expert needs to safely assess the damage and replace the wiring harness.
- You already replaced a part and nothing changed. It happens. You thought it was the thermal fuse, you put a new one in, and… still no heat. A pro can find the real root cause so you don't keep throwing money at the wrong parts.
A professional diagnosis does more than just fix the problem; it gives you peace of mind. Knowing the repair was done correctly and safely, often with a warranty, is worth every penny. It’s about getting it done right the first time.
The Real Value of a Professional Diagnosis
When you call in a certified technician, you're getting more than just a repair. You're getting expertise. A seasoned pro can spot issues a DIYer would easily miss, diagnosing complex electrical faults in minutes.
They also have access to the right parts—genuine Original Equipment Manufacturer (OEM) parts that are made specifically for your dryer model. They show up with a van full of them, which means they can usually fix it on the first trip. No waiting a week for a part you ordered online to arrive.
If you need a fast, reliable solution, it’s worth looking into expert dryer repair services in Allen, TX. A professional can save you time, prevent you from accidentally causing more damage, and make sure your dryer runs safely for years to come.
Common Questions About Dryer Heating Problems
Even after methodically checking all the usual suspects, it's normal to have a few lingering questions. A dryer that suddenly stops heating can throw your whole week off track, so getting clear answers is key. Here are some of the most frequent questions we get from homeowners in Plano and Frisco when they're staring down a pile of wet laundry and a cold dryer.
Why Does My Dryer Stop Heating Mid-Cycle?
This one is a real head-scratcher for a lot of people. The dryer heats up just fine at the beginning, but somewhere along the way, it goes cold, leaving your clothes damp at the end of the cycle.
Nine times out of ten, this is a classic sign of overheating caused by poor airflow. A partial clog in your dryer vent acts like a bottleneck, causing heat to build up inside the dryer drum. When the internal temperature gets too high, the high-limit thermostat does exactly what it's designed to do: it trips and cuts power to the heating element to prevent a fire. The drum will keep tumbling, but without any heat.
Is It Worth Repairing an Older Dryer?
This is the big question: fix it or replace it? I always tell people to use the 50% rule. If the cost of the repair is less than half the price of a brand-new, comparable dryer, fixing it is almost always the smarter financial move.
Dryers are surprisingly straightforward appliances. Most of the common heating problems, like a bad thermal fuse or a burned-out heating element, are relatively inexpensive fixes that can easily give your machine several more years of life. But if your dryer is over 10-12 years old and you're looking at a major, costly repair like a new motor or control board, it might be time to start shopping for a new one.
Can I Use My Dryer If It's Not Heating?
Technically, it might still tumble, but running a dryer without heat is a bad idea for a couple of reasons. The obvious one is that it won’t actually dry your clothes. Leaving wet laundry sitting in a closed drum is a perfect recipe for musty smells and mildew.
The more serious issue is safety. The root cause of the problem—very often a clogged vent—is a major fire hazard. By continuing to run the dryer, even without heat, you're not addressing the dangerous condition that caused it to fail in the first place. For more guidance on knowing when it's time to call in a pro, you can check out our other appliance repair topics.
Expert Insight: Whatever you do, never bypass a safety device like a thermal fuse just to get the dryer working again. Those parts are designed to be the weak link for a reason—to protect you and your home from a potential fire. A qualified technician can figure out why the fuse blew and fix the underlying problem safely.
How Can I Tell if the Heating Element Is Bad?
A dead heating element usually has one clear symptom: the dryer runs, the drum spins, but you get absolutely zero heat from the moment you press start. It’s just cold air, all the time.
You can often spot a bad element just by looking at it. After unplugging the dryer and opening it up, inspect the coil—if you see a visible break or a charred, black spot, you've found your culprit. For a definitive answer, though, you'll need a multimeter. A good element will have continuity, meaning electricity can flow through it. A broken one won't, and the multimeter will read "open circuit." This is a cornerstone of any good dryer not heating troubleshooting.
When you've tried everything you can and the dryer still won't cooperate, it's time to call a local expert you can rely on. The certified technicians at ThumbUp.Pro offer fast, reliable dryer repair services throughout Allen, Plano, Frisco, and McKinney. We provide same-day appointments to get your household back to normal. Book your appointment online and you’ll save $20 on the service.
Article created using Outrank