Have you ever poured a glass of water from your fridge dispenser and it just tasted… off? Or maybe your ice maker is struggling to keep up with demand. More often than not, the culprit isn't the fridge itself, but a dirty water line. For homeowners, especially here in North Dallas communities like Allen and Plano, giving that water line a good cleaning is a vital bit of home maintenance that makes a world of difference in your water quality and appliance performance. The good news is, it's a straightforward job that just involves flushing the line to clear out mineral gunk and biofilm.
Why Bother Cleaning Your Refrigerator Water Line in Frisco and McKinney?
Think of the water line as the hidden plumbing that brings crisp, cool water to your glass and your ice maker. Over time, that narrow little tube can become a haven for bacteria, mold, and mineral deposits. This is especially true in areas like Plano and Frisco, where we're all too familiar with hard water. These contaminants do more than just make your water taste funky; they can affect your family's health and drag down your refrigerator's performance.
Letting this go can lead to some pretty annoying problems that mess with your daily routine. What starts as a minor inconvenience can quickly snowball into bigger, more frustrating issues.
Telltale Signs of a Dirty Water Line
You don't need a technician's license to figure out when your water line needs a good flush. Your refrigerator is usually pretty good at sending out warning signals. Here are the big ones to watch out for.
It's helpful to know what to look for. A quick check of your water and ice can tell you everything you need to know about the state of your water line.
Signs Your Refrigerator Water Line Needs Cleaning
| Symptom | Dirty Water Line Indicator | Clean Water Line Indicator |
|---|---|---|
| Taste & Odor | Water or ice has a musty, stale, or chemical flavor. | Water and ice taste fresh, clean, and neutral. |
| Ice Appearance | Ice cubes are cloudy, discolored, or have visible specks. | Ice cubes are crystal clear. |
| Water Flow | The dispenser stream is weak, slow, or just a trickle. | A strong, steady stream of water from the dispenser. |
| Ice Production | The ice maker is slow or has stopped making ice completely. | The ice bin is consistently full. |
Spotting any of the signs in the "Dirty Water Line" column is a clear signal that it's time for a cleaning.
- Weird Taste or Smell: This is the most common giveaway. If your water or ice suddenly has a musty, stale, or even a slight chemical taste, you're likely dealing with biofilm or mold.
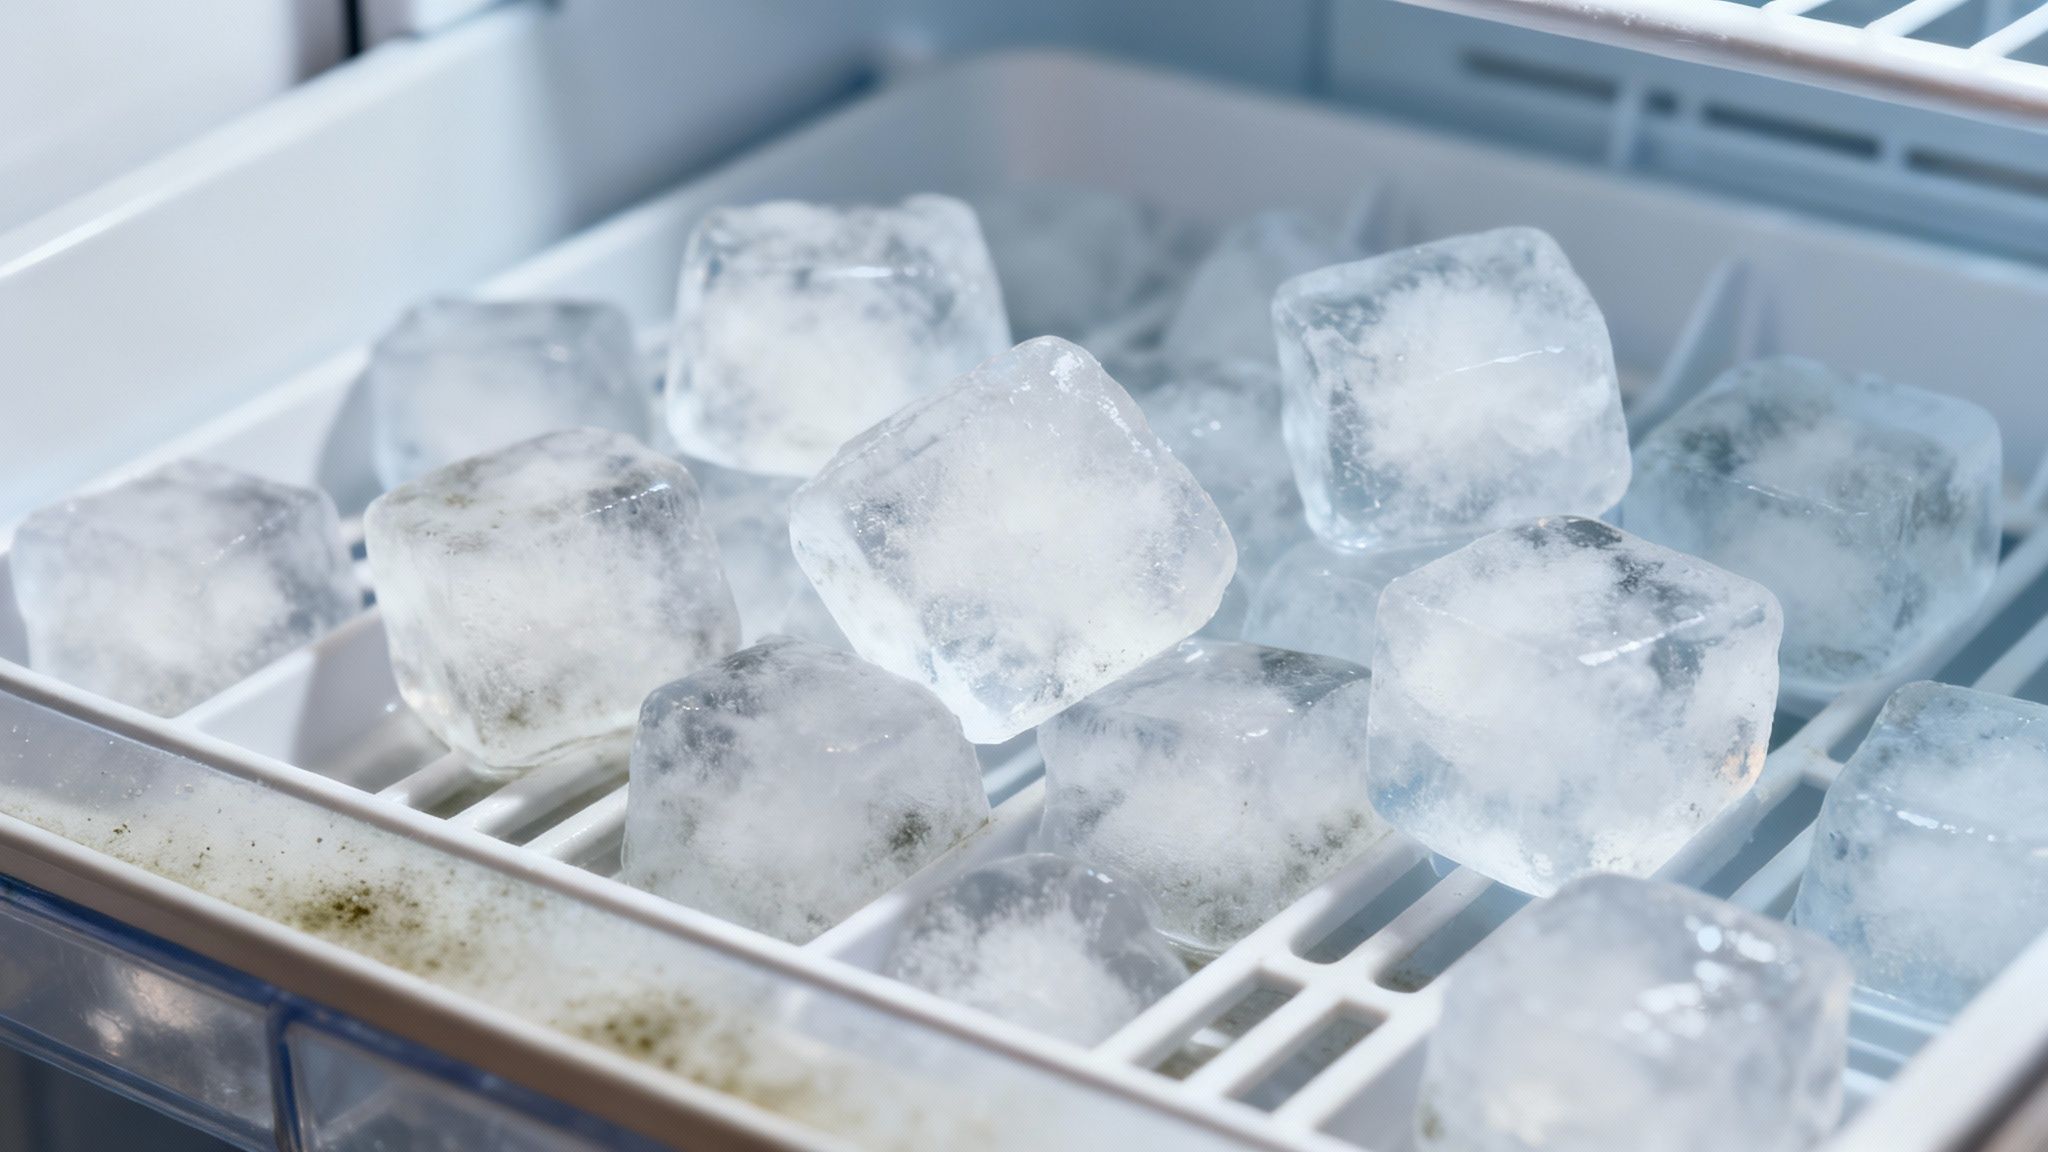
- Cloudy or Funky-Looking Ice: Good water makes clear ice. If your ice cubes are consistently cloudy or have little black specks in them, it's a dead ringer for mineral deposits or other impurities being frozen right in.
- Weak Water Flow: Is the dispenser putting out a sad little trickle? That’s probably limescale—a hard mineral buildup—creating a bottleneck in the line and killing your water pressure.
- Slow Ice Making: A clogged line means the ice maker isn't getting enough water. This will cause it to make ice at a snail's pace or even stop producing it entirely. If you're running into this, our ice maker troubleshooting guide can help you pinpoint the exact cause.
A dirty water line isn't just about bad-tasting water—it's about the health and efficiency of your appliance. A little preventive cleaning now saves you from potential repair headaches and ensures your family always has clean, fresh water on tap.
The Payoff of Proactive Cleaning
Taking the time to regularly clean your refrigerator's water line is one of the smartest things you can do for your home. For those of us in places like McKinney and Allen, where hard water is a fact of life, this task is even more crucial.
It’s not just us, either. People are paying more attention to appliance hygiene everywhere. The global market for refrigerator cleaners is actually projected to hit $6 billion USD, and a huge chunk of that demand comes from North American households. It just goes to show that keeping things clean and safe at home is becoming a top priority for everyone. Proactive cleaning is no longer just a good idea; it's a core part of being a savvy homeowner.
Gathering Your Tools and Supplies for the Job
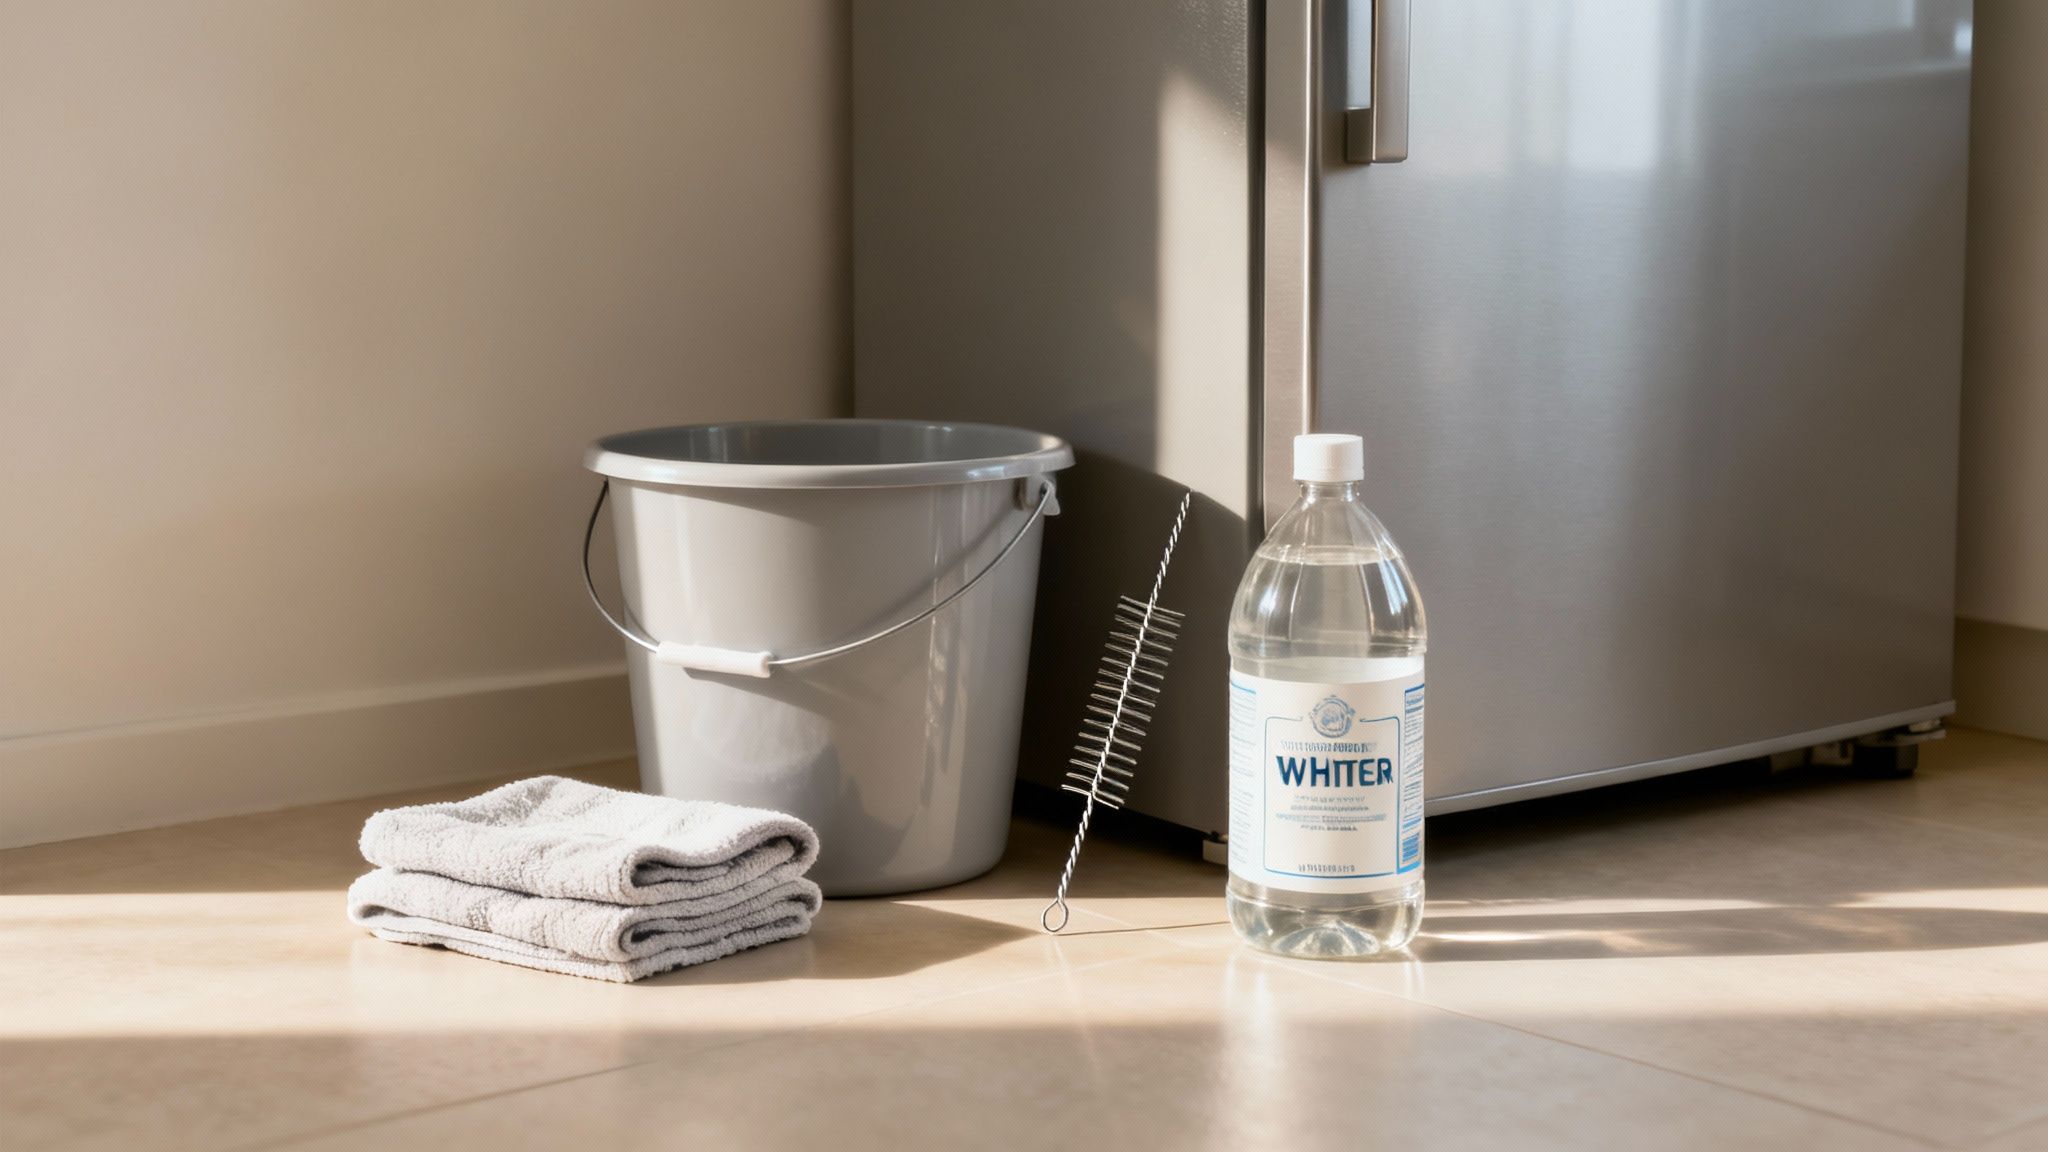
Before you even think about pulling your fridge away from the wall, let's get everything you need in one place. Trust me, spending five minutes on prep will save you from a frantic, mid-job search for a wrench while water is dripping on your floor.
Most of this stuff is probably already in your house. Getting it all together now makes the whole process smoother and a lot less messy.
Your Essential Cleaning Checklist
You’ll want to grab a few basic items to handle any disassembly and the inevitable water spills. Think of this as your foundational toolkit.
- Several Old Towels and a Bucket: This is non-negotiable. No matter how careful you are, some water will escape when you disconnect the line. Be ready for it.
- Adjustable Wrench or Pliers: You'll need one of these to get a good grip on the compression nuts holding the water line in place.
- A Small Funnel: Trying to pour liquid into that tiny tube without a funnel is a recipe for a puddle. A simple kitchen funnel works perfectly.
- A Thin, Flexible Wire Brush: You can find these at most hardware stores; they’re often called tube brushes. It's the secret weapon for scrubbing out any gunk that’s really caked on inside the line.
Once you have these tools handy, you're pretty much ready to go. The only thing left is to pick your cleaning agent.
The Best Cleaning Solution
You could go out and buy a commercial cleaner, but honestly, the best tool for the job is probably sitting in your pantry right now. It's cheap, incredibly effective, and completely food-safe.
Distilled White Vinegar: The natural acidity in vinegar is a powerhouse when it comes to dissolving the limescale and mineral deposits that build up over time, especially with the hard water we often see in areas like Frisco and McKinney. Plus, it’s a natural disinfectant that can kill off any lurking mold or bacteria.
You’ll also want about one or two cups of fresh water on hand to flush the line out when you’re done. This final rinse gets rid of any leftover vinegar taste.
Having everything you need within arm's reach before you unplug the fridge is the key. A little prep work is all it takes to turn this from a potential headache into a simple, satisfying maintenance task.
How to Safely Clean Your Refrigerator Water Line
Alright, let's get our hands dirty. Cleaning your refrigerator's water line might sound intimidating, but it's a project most homeowners can absolutely handle with a little bit of time and patience. I've walked plenty of people through this process, and this guide will give you the confidence to get it done right, ensuring every glass of water from your fridge is clean and fresh.
We'll break this down into a few key stages: getting everything prepped safely, disconnecting and cleaning the line, and then putting it all back together without any leaks.

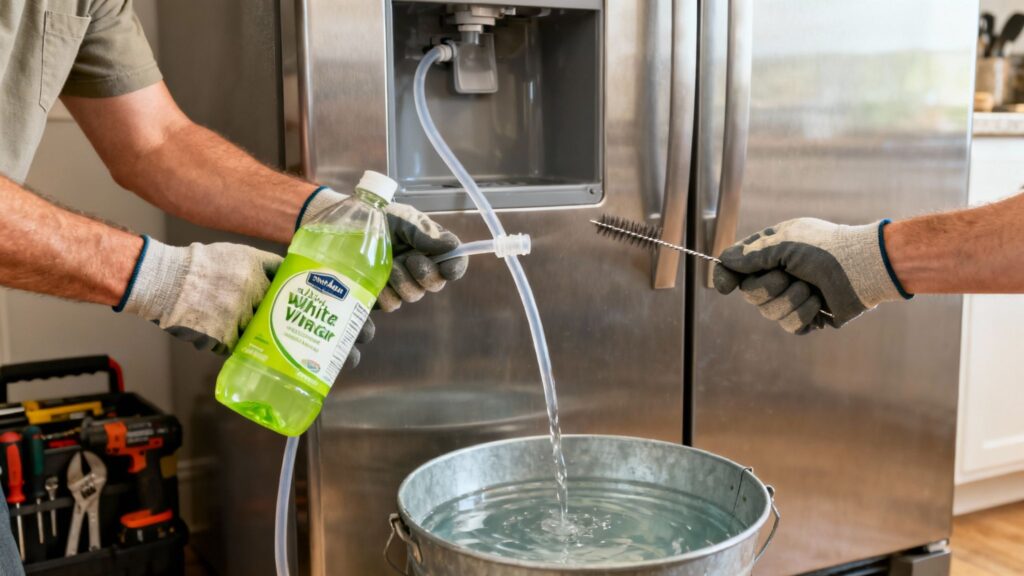
As you can see in the visual guide, the core of the job involves disconnecting the line and using a specialized brush to scrub out all the gunk. This is especially important in areas with hard water, where mineral buildup is a constant battle. The big takeaway here is that a combination of a good cleaning solution and some gentle scrubbing is your best bet for restoring flow and getting rid of any off-tastes.
Getting Prepped: Safety First
Before you even think about grabbing a wrench, we need to talk about safety. The first two steps are non-negotiable—you have to cut the power and shut off the water. Skipping this is how you end up with a flooded kitchen or a nasty electrical shock.
- Unplug the Fridge: Carefully slide your refrigerator out from the wall, just enough so you can reach the power cord. Unplug it from the outlet. Simple as that.
- Shut Off the Water: Find the water supply valve. It's usually a small handle on the wall behind the fridge, but sometimes it’s under the sink, connected to a thin copper or plastic tube. Turn the handle clockwise all the way until it stops.
Accessing and Inspecting the Line
With the fridge powerless and the water off, you're ready to tackle the water line. Grab your adjustable wrench and carefully loosen the compression nuts that attach the line to the back of the refrigerator and the wall valve. Keep your bucket and towels handy, because a little bit of leftover water is guaranteed to spill out.
Once the line is free, hold it up and take a good look inside. See a chalky, white film? That’s limescale, a familiar foe for anyone in Plano or McKinney. If you spot any dark, slimy buildup, that’s likely biofilm. This initial inspection is crucial because it tells you just how much scrubbing you're in for.
The Cleaning and Flushing Process
Now it’s time for the main event. This is where your white vinegar and thin brush become your best friends. Using a small funnel will make this part a whole lot less messy.
- Pour in the Vinegar: Stick one end of the disconnected water line deep into your bucket. At the other end, use your funnel to slowly pour in about a cup of distilled white vinegar.
- Let It Work Its Magic: Let the vinegar sit in the line for at least 5 to 10 minutes. This gives the acetic acid a chance to start breaking down those stubborn mineral deposits.
- Scrub Away the Grime: For really tough buildup, this is where the brush comes in. Gently feed it through the line, working it back and forth to dislodge any caked-on gunk. Just be careful not to be too aggressive and puncture the tube.
- Flush It All Out: After the soak (and optional scrub), use the funnel again to run clean, fresh water through the line. Keep flushing until the water coming out into the bucket is completely clear and free of debris.
Don't forget the ice bin! While the line is soaking, take out the ice bin and give it a good wash with warm, soapy water. A dirty bin can make even the cleanest ice taste funky.
Reconnecting and Checking Your Work
With a sparkling clean line, you’re on the home stretch. It’s time to put everything back in its place.
Carefully reattach the water line to the refrigerator and the wall valve. As you tighten the compression nuts, aim for "snug," not "cranked down with all your might." Overtightening is the number one cause of cracked fittings and slow leaks.
Before you push the fridge back, slowly turn the water valve back on (counter-clockwise) and watch the connection points like a hawk. If you spot even the slightest drip, turn the water off immediately and give the nuts another quarter-turn.
Once you’re confident there are no leaks, plug the refrigerator back into the wall. Run the water dispenser for a minute or two to clear out any air bubbles or leftover vinegar taste. You’ll also want to toss out the first one or two batches of ice for the same reason.
It’s no surprise that people are paying more attention to appliance hygiene. The market for refrigerator cleaners is already valued around $500 million and is expected to keep growing as more homeowners realize the importance of routine maintenance. You can discover more insights about this trend and see how cleaning products are evolving to meet this demand.
Choosing Your Cleaning Solution: Vinegar vs. Chemicals
Alright, so you’re ready to clean out that refrigerator water line. The first big question you need to answer is: what are you going to clean it with? You really have two main camps here: good old distilled white vinegar or a specialized commercial cleaner you'd buy at the store.
Honestly, there's no single right answer—it really comes down to what you're comfortable with and how gunked up your water line actually is.
For a lot of homeowners, especially here in Plano and Frisco where hard water is just a fact of life, it's a trade-off between pure cleaning muscle and using something natural in your home. The commercial products are designed to aggressively attack stubborn mineral buildup, and they do a fantastic job.
But there's a big push toward natural solutions these days. It's not just a local trend, either. The market for natural refrigerator cleaners is growing by about 6% every year, which is faster than their chemical counterparts. People are just more conscious of what they're using in their homes. If you're curious about the data, you can read the full research about this market shift and see how buying habits are changing.
The Case for Distilled White Vinegar
Vinegar is the classic DIY solution for a reason. It’s a natural acid, which makes it surprisingly effective at breaking down the calcium and magnesium deposits—what we call limescale—that are likely clogging your line.
Best of all, it's completely food-safe, cheap, and probably sitting in your kitchen cabinet right now. The peace of mind you get from knowing there won't be any harsh chemical residue in your next glass of water is a huge plus, particularly if you have kids.
When to Consider a Commercial Cleaner
Now, let's talk about the heavy hitters. Commercial descalers are purpose-built for this job. They often contain stronger acids or other agents that can dissolve severe blockages much faster than vinegar ever could.
If it’s been years since the line was last cleaned, or if your water dispenser is down to a pathetic trickle, a commercial cleaner might be just what you need to get things flowing freely again. The key is to be extremely careful and follow the flushing instructions to the letter. You want to make sure every last trace of that chemical is gone before you use the water or ice again.
Pro Tip for North Dallas Homes: My rule of thumb for folks in places like Allen or McKinney is pretty simple. For your regular six-month clean-out, vinegar is perfect. It’s all you need. But if you’ve just moved into a new house or you’re dealing with a line that's been ignored for ages, hit it with a commercial cleaner once to get a clean slate. After that, you can easily maintain it with vinegar going forward.
To make the choice even clearer, let’s break down the pros and cons side-by-side.
Comparing Cleaning Solutions: Vinegar vs. Commercial Cleaners
Deciding between a natural approach and a specialized product can be tough. The table below lays out the key differences to help you choose the right solution for your home and your specific cleaning needs.
| Feature | Distilled White Vinegar | Commercial Cleaning Solution |
|---|---|---|
| Effectiveness | Excellent for moderate mineral buildup and routine cleaning. | Superior for severe limescale and long-neglected lines. |
| Safety | Completely food-safe and non-toxic, with no harmful residues. | Requires thorough flushing to remove all chemical traces. |
| Cost | Extremely affordable, costing just a few dollars per bottle. | More expensive, with prices varying by brand and formulation. |
| Environmental Impact | Biodegradable and eco-friendly. | May contain chemicals that are less friendly to the environment. |
| Accessibility | Available at any grocery store. | Found at hardware stores or requires online ordering. |
Ultimately, it’s about picking the right tool for the job. For most people doing regular maintenance, vinegar is the safe, easy, and effective choice. But if you’re facing a serious clog, don’t be afraid to bring in the power of a commercial cleaner to get your water line back in top shape.
Keeping It Clean: Long-Term Maintenance Tips for Allen, TX Residents
You've done the hard work and cleaned out that water line. The reward? Great-tasting water and ice that's actually clear. Now, let's keep it that way. A little proactive care goes a long way, especially here in North Dallas where our hard water loves to cause trouble.
Trust me, staying ahead of buildup is much easier than wrestling with another stubborn clog down the road. A few simple habits will keep your fridge running smoothly and your water tasting pure, so you won't have to repeat this deep-clean anytime soon.
Make Flushing a Regular Habit
Think of this as a quick rinse for your water line—it’s the key to preventing minerals from setting up camp and hardening into a blockage. The easiest way to nail this is to put it on a schedule.
For most folks in areas like Plano or Allen, a quick flush every six months does the trick. It’s just enough to dislodge any new mineral deposits before they can get a solid grip inside that narrow tube.
Here's a pro tip: Set a recurring reminder on your phone. Better yet, schedule your water line flush for the same day you swap out your refrigerator's water filter. You’ll knock out two crucial maintenance tasks in one go.
Your Water Filter is Your Best Friend
Honestly, the single best way to fight mineral buildup is a good, high-quality water filter. Every fridge has one, but they don't last forever. Once a filter is spent, it can’t do its job of trapping the sediment and minerals that are so common in the water supply around Frisco and McKinney.
- Change It on Time: Stick to the manufacturer's replacement schedule, which is usually every six months. An old filter isn't just ineffective; it can actually become a breeding ground for gunk.
- Think Bigger: If your home has seriously hard water, a whole-home water softener or filtration system is worth considering. It protects not just your fridge but all your appliances from limescale damage.
Learn to Spot the Early Warning Signs
You can often stop a major problem by catching it early. Just pay attention to the little things your fridge might be telling you. These subtle changes are usually the first sign that your water line is getting dirty again. If you're dealing with a specific brand, like a KitchenAid, sometimes there are known quirks. Our guide to KitchenAid fridge troubleshooting can help with model-specific issues.
Keep an eye (and a nose) out for these clues:
- The water tastes or smells just a little… off.
- Your ice cubes are starting to look more cloudy than clear.
- The water dispenser's flow seems a bit weaker than it used to be.
Catching any of these early gives you the chance to do a quick flush before a real clog forms. It’s the simplest way to keep everything in top shape.
When to Call an Appliance Pro in North Dallas
Look, tackling a DIY refrigerator water line cleaning is a fantastic way to keep your appliance running smoothly. But part of being a smart homeowner is knowing when to throw in the towel. Sometimes, a project just isn't what it seems on the surface, and pushing forward can lead to a world of frustration, a giant puddle on your kitchen floor, and a much bigger repair bill.
If you’ve gone through all the steps—the vinegar flush, the pressure checks—and you’re still not getting that clean, steady flow of water, it’s a good sign that the problem runs deeper than a simple clog. For folks all over North Dallas, from Celina down to Plano, recognizing these moments is the key to avoiding a DIY disaster.
Signs You Need an Expert Technician
So, what are the red flags? Certain issues just aren't worth messing with unless you have the right tools and training. If you run into any of these, it's time to call for backup.
- Persistent Leaks After Reassembly: A tiny drip from a connection you just tightened? Okay, give it another quarter-turn and see what happens. But if you’ve reconnected everything, checked it twice, and you’ve still got a steady drip, stop. You could be looking at a cross-threaded nut, a cracked fitting, or a damaged seal that no amount of tightening will fix.
- No Water Flow at All: You've successfully flushed the line, you know there's no blockage, but the dispenser still won't give you a single drop. This often points to a failed water inlet valve. That’s the little electronic gatekeeper that tells your fridge when to let water in, and replacing it involves both plumbing and electrical work. It’s not a job for a beginner.
- Visible Damage to the Water Line: While you were inspecting the line, did you notice it was severely kinked, cracked, or looked brittle and discolored? Don't even bother trying to clean it. A compromised water line is just a catastrophic leak waiting to happen. It needs to be replaced entirely by a pro.
What feels like a simple clog can easily be a symptom of a larger component failure. A professional technician has the diagnostic gear to tell the difference between a routine maintenance task and a part that’s about to give up the ghost. They’ll get it right the first time.
Why Professional Repair Saves Time and Money
Trying to muscle your way through a complex repair without the right know-how can get expensive, fast. You might snap a plastic fitting, short out an electrical component, or simply fail to fix the actual problem, meaning you'll be right back where you started in a week.
An experienced appliance technician in McKinney can pinpoint the issue in minutes, using specialized tools to test water pressure and valve solenoids. They also come prepared. Their trucks are stocked with the most common replacement parts, so they can usually wrap up the job in one trip. That kind of efficiency is priceless, especially when you weigh it against the cost of replacing warped floorboards from a botched repair.
If you're in Allen and find yourself in over your head, getting professional help is the smartest and safest decision. You can learn more about professional fridge repair in Allen, TX, and even schedule same-day service to get things working again without the headache. In the end, calling a pro buys you the confidence that the job was done correctly and safely.
When a DIY fix turns into a major headache, ThumbUp.Pro is here to help. We offer fast, reliable appliance repair across Allen, Plano, Frisco, and McKinney. Book your same-day appointment online at https://thumbup.pro and let our certified technicians solve the problem for you.