When your Samsung refrigerator suddenly stops making ice, it’s easy to assume the worst. Before you start thinking about expensive repairs or calling a technician in Plano, take a deep breath. More often than not, the culprit is something surprisingly simple.
I've seen it countless times with homeowners in Plano and Frisco—a simple, overlooked setting is usually the cause. Running through a quick diagnostic can save you a ton of frustration and money.
The truth is, problems with Samsung ice makers are incredibly common. It’s not just your imagination. A staggering 68% of Samsung refrigerator owners reported issues with their ice makers within the first three years, a key statistic from a major class action lawsuit. These problems pop up across all sorts of models, from the popular French door styles to the classic side-by-sides. You can learn more about these widespread appliance findings and check if your model is on the list.
This is exactly why starting with the basics is so critical. You need to rule out the easy fixes before you even think about pulling out your tools.
The Initial Checks: What Plano & Frisco Residents Should Look for First
Before you start taking anything apart, walk through these three fundamental checks. They tackle the most frequent reasons an ice maker quits working and can often get you back up and running in minutes, whether you're in McKinney or anywhere in North Dallas.
Make Sure It's Actually Turned On: This sounds almost too simple, but it’s the number one reason for service calls. Check for a power button or an icon on the control panel. On some models, a stray bag of frozen peas can bump the control arm into the "off" position. It happens.
Check Your Freezer's Temperature: For the ice maker to even think about starting a harvest cycle, its internal thermostat needs to see a temperature of 0°F (-18°C) or colder. If your freezer is even a few degrees too warm, the ice maker will pause itself to avoid creating a slushy mess.
Inspect the Water Line for an Ice Blockage: A frozen water supply line is another common issue, particularly if your freezer is set to a super-low temperature. You can often feel the blockage by gently running your hand along the thin water line at the back of the freezer. If you feel a bulge of ice, you've found your problem.
To make this even simpler, here's a quick table you can use to diagnose the problem at a glance.
Quick Diagnostic Checklist for Samsung Ice Maker Issues
| Symptom | Initial Check | Simple Solution |
|---|---|---|
| No ice at all | Is the ice maker turned on? | Locate the power button or control arm and ensure it's in the "On" position. |
| Small or misshapen cubes | What's the freezer temperature? | Adjust the freezer setting to 0°F (-18°C) for optimal ice production. |
| No water in the mold | Is the water line frozen? | Gently feel the line for an ice blockage. If found, carefully thaw it. |
| "Off" icon is lit | Has the ice bin been removed? | Re-insert the ice bin correctly to disengage the shut-off sensor. |
Running through these initial steps will solve the majority of common ice maker headaches without needing any tools. If these don't work, then it's time to dig a little deeper.
Common Samsung Ice Maker Problems and Fixes for McKinney & Allen Homes
Alright, so you've checked the basics and your Samsung ice maker is still on the fritz. It's time to roll up your sleeves and dig into the more common—and infamous—issues that these units are known for. Whether it's a solid block of ice where cubes should be or a tray that's bone dry, you can often get things working again with a bit of patience. Let's walk through the usual suspects for homeowners in the Allen area.
By far, the most frequent complaint I hear is an ice maker that has completely frozen over. Moisture gets in, freezes around the moving parts, and grinds the whole operation to a halt. The only way forward is a good old-fashioned manual defrost.
Safely Thawing Out a Frozen Ice Maker
Before you do anything else, unplug the refrigerator from the wall. I can't stress this enough—it's a non-negotiable safety step.
Once it's unplugged, lay a towel down in the ice maker compartment to soak up the inevitable drips. Grab a hairdryer, set it to low heat (never hot!), and gently work your way around the unit, melting the ice buildup. It’s tempting to grab a screwdriver and start chipping away, but trust me, don't. You’ll almost certainly crack the plastic and create a much bigger problem.
This isn't a quick fix; it takes time. But it's the right way to clear the ice without damaging your appliance. After all the ice is gone, you're clear to plug the fridge back in.
This quick process flow shows the basic checks to run before starting any manual defrost or repair.
As the visual shows, confirming power, clearing blockages, and setting the right temperature are your first lines of defense.
Tackling Water Supply and Ice Cube Problems in North Dallas
What if the ice maker isn't frozen, but just… empty? No water means no ice. In fact, around 34% of consumers report problems with their dispenser not producing water or ice. This usually points to one of two things: a clogged water filter or a busted water inlet valve. For more on appliance issues, you can discover more insights about common appliance issues on cinchhomeservices.com.
Here in areas like Allen and McKinney, our hard water can be tough on appliances, leading to faster mineral buildup. That's why changing your water filter every six months is crucial. If you just put a new one in and the problem persists, you might have a clogged water line. We've got a whole guide on how to properly clean a refrigerator water line if you need to go that route.
Pro Tip: Are your ice cubes coming out small, hollow, or misshapen? That’s almost always a classic sign of low water pressure. Before you start taking things apart, check the water supply valve behind your fridge. Make sure it's fully open and that the line hasn't been kinked or pinched. A simple tweak here can often fix your ice quality instantly.
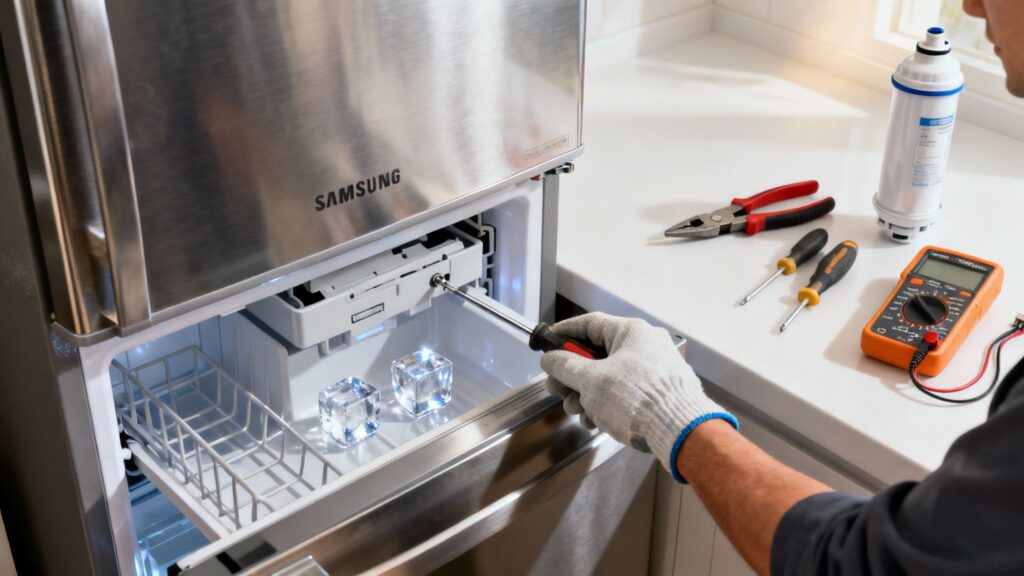
Getting Your Tools and Safety Gear in Order
Before you even think about taking apart your Samsung ice maker, let's talk about prep work. Getting the right tools together first will save you a ton of frustration later. You don't need to raid a hardware store, but a few specific items will make the job go a whole lot smoother.
Think of it like cooking: you wouldn't start making a new recipe without having all the ingredients and utensils laid out. This is the same idea.
Your Go-To Repair Kit
For most common ice maker problems, you'll only need a handful of basic tools. Having these ready will cover about 90% of the fixes you're likely to encounter.
- Phillips-Head Screwdriver: This is your primary tool for removing the ice maker assembly and any access panels.
- Plastic Putty Knife or Spatula: I can't stress this enough: never use metal to pry or scrape. You'll almost certainly crack the plastic housing. A cheap plastic tool is your best friend here.
- A Few Old Towels: Trust me, you'll need them. Ice and water will inevitably get on the floor, and you want to be ready to catch it.
- Hair Dryer or Steamer: This is the safest way to melt any ice blockages without warping the plastic components.
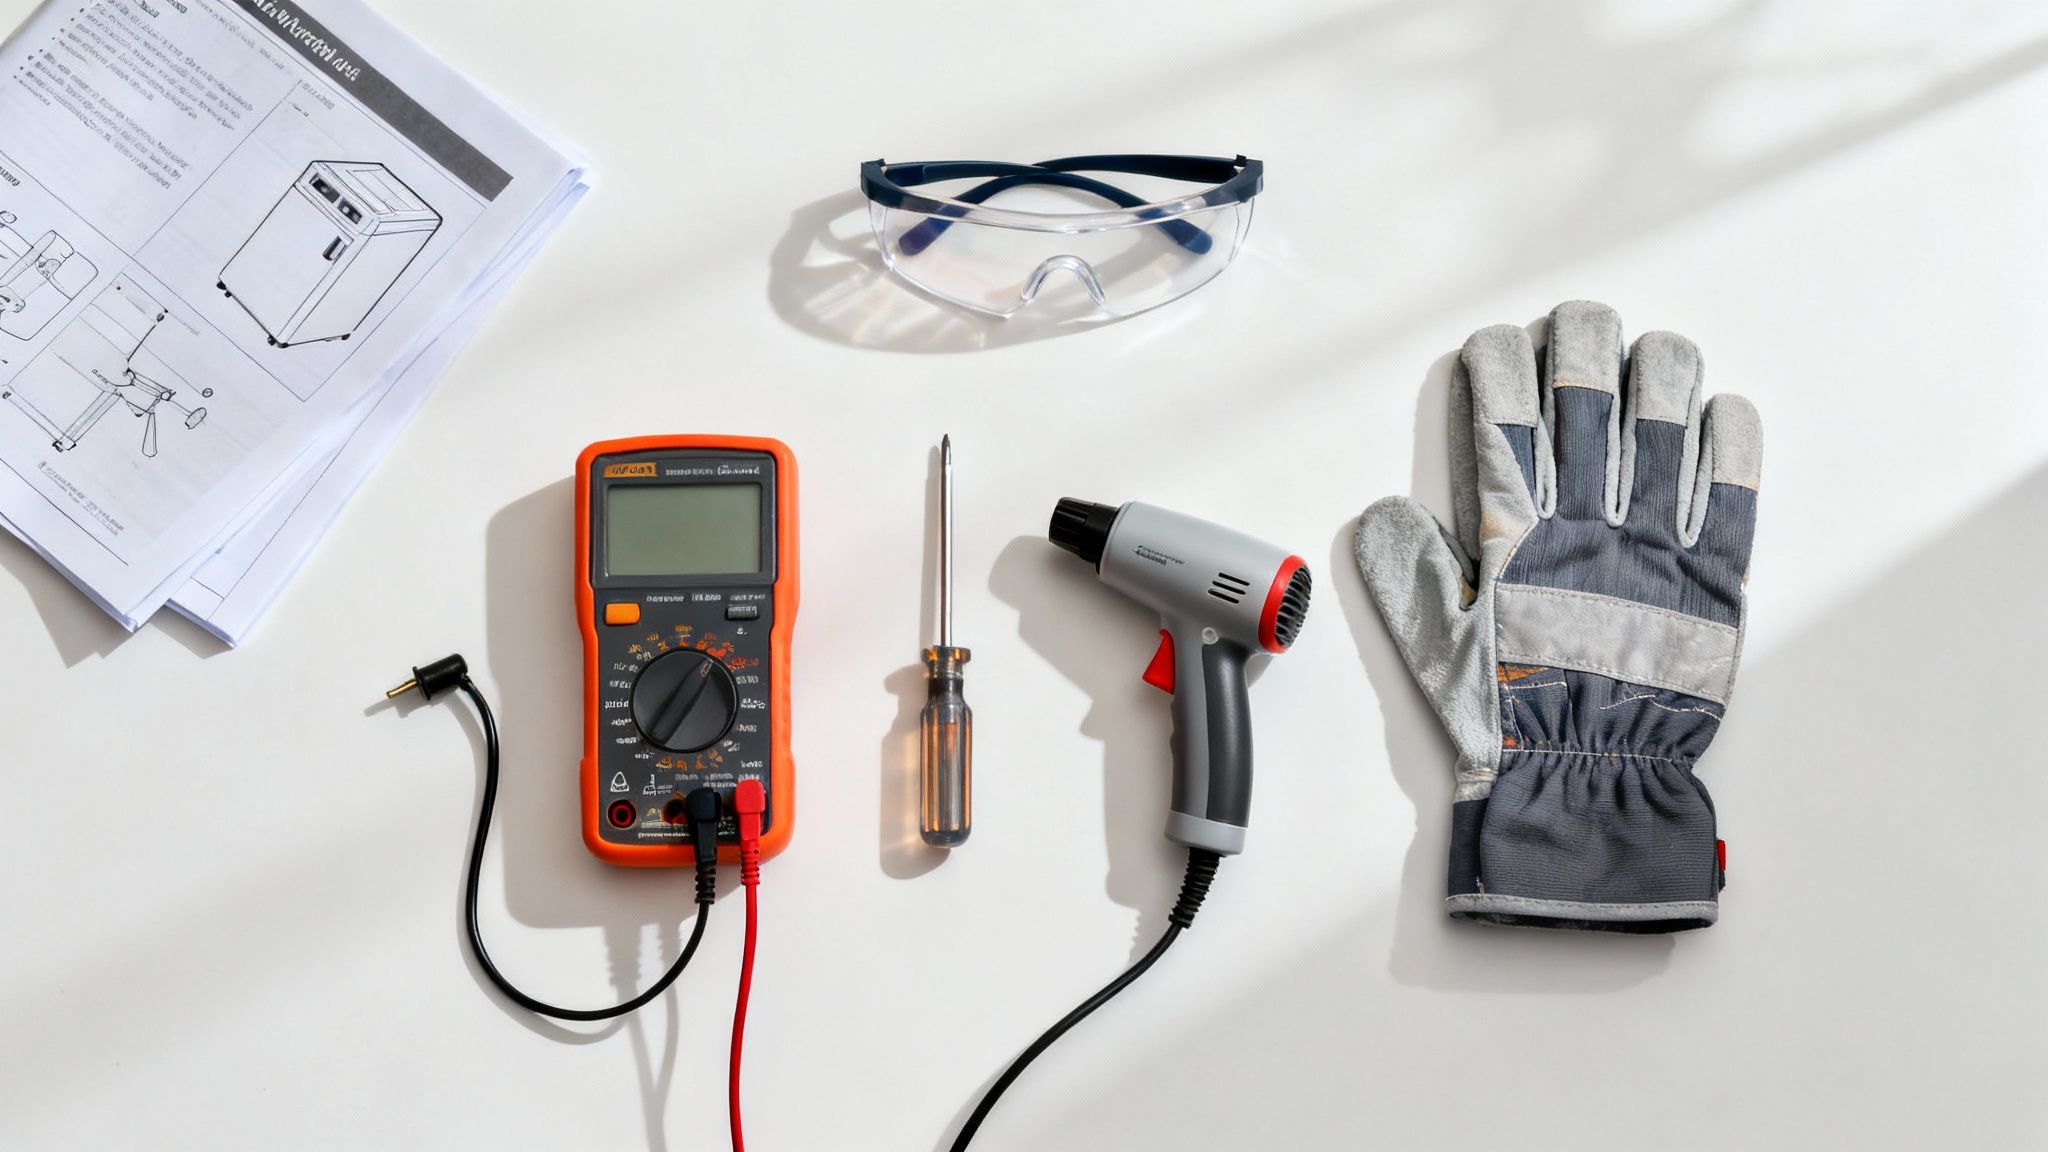
No repair is worth getting hurt over. Whether you're in North Dallas or anywhere else, taking a few minutes to be safe can prevent a trip to the emergency room or a call to a plumber for a busted water line.
Safety First—Always
For our local homeowners in Plano and Frisco, taking these safety steps is non-negotiable. Don't touch a single screw until you've done these three things:
First, walk over to the wall and unplug the refrigerator completely. Don't just turn it off—disconnect it from the power source entirely.
Next, you need to shut off the water supply. The valve is usually located behind the fridge or under the kitchen sink. Turn it clockwise until it's firmly closed.
Finally, put on a pair of protective gloves. They'll give you a better grip on cold, slippery parts and protect your hands from any sharp plastic or metal edges.
Reset and Test Your Ice Maker: A Key Step for Celina Residents
Sometimes the most frustrating appliance problems have surprisingly simple solutions. Before you start thinking about expensive parts or service calls in Celina, a quick reset can often clear electronic hiccups and get your Samsung ice maker working again. This is always my first diagnostic step—it tells you so much about what’s actually going on inside.
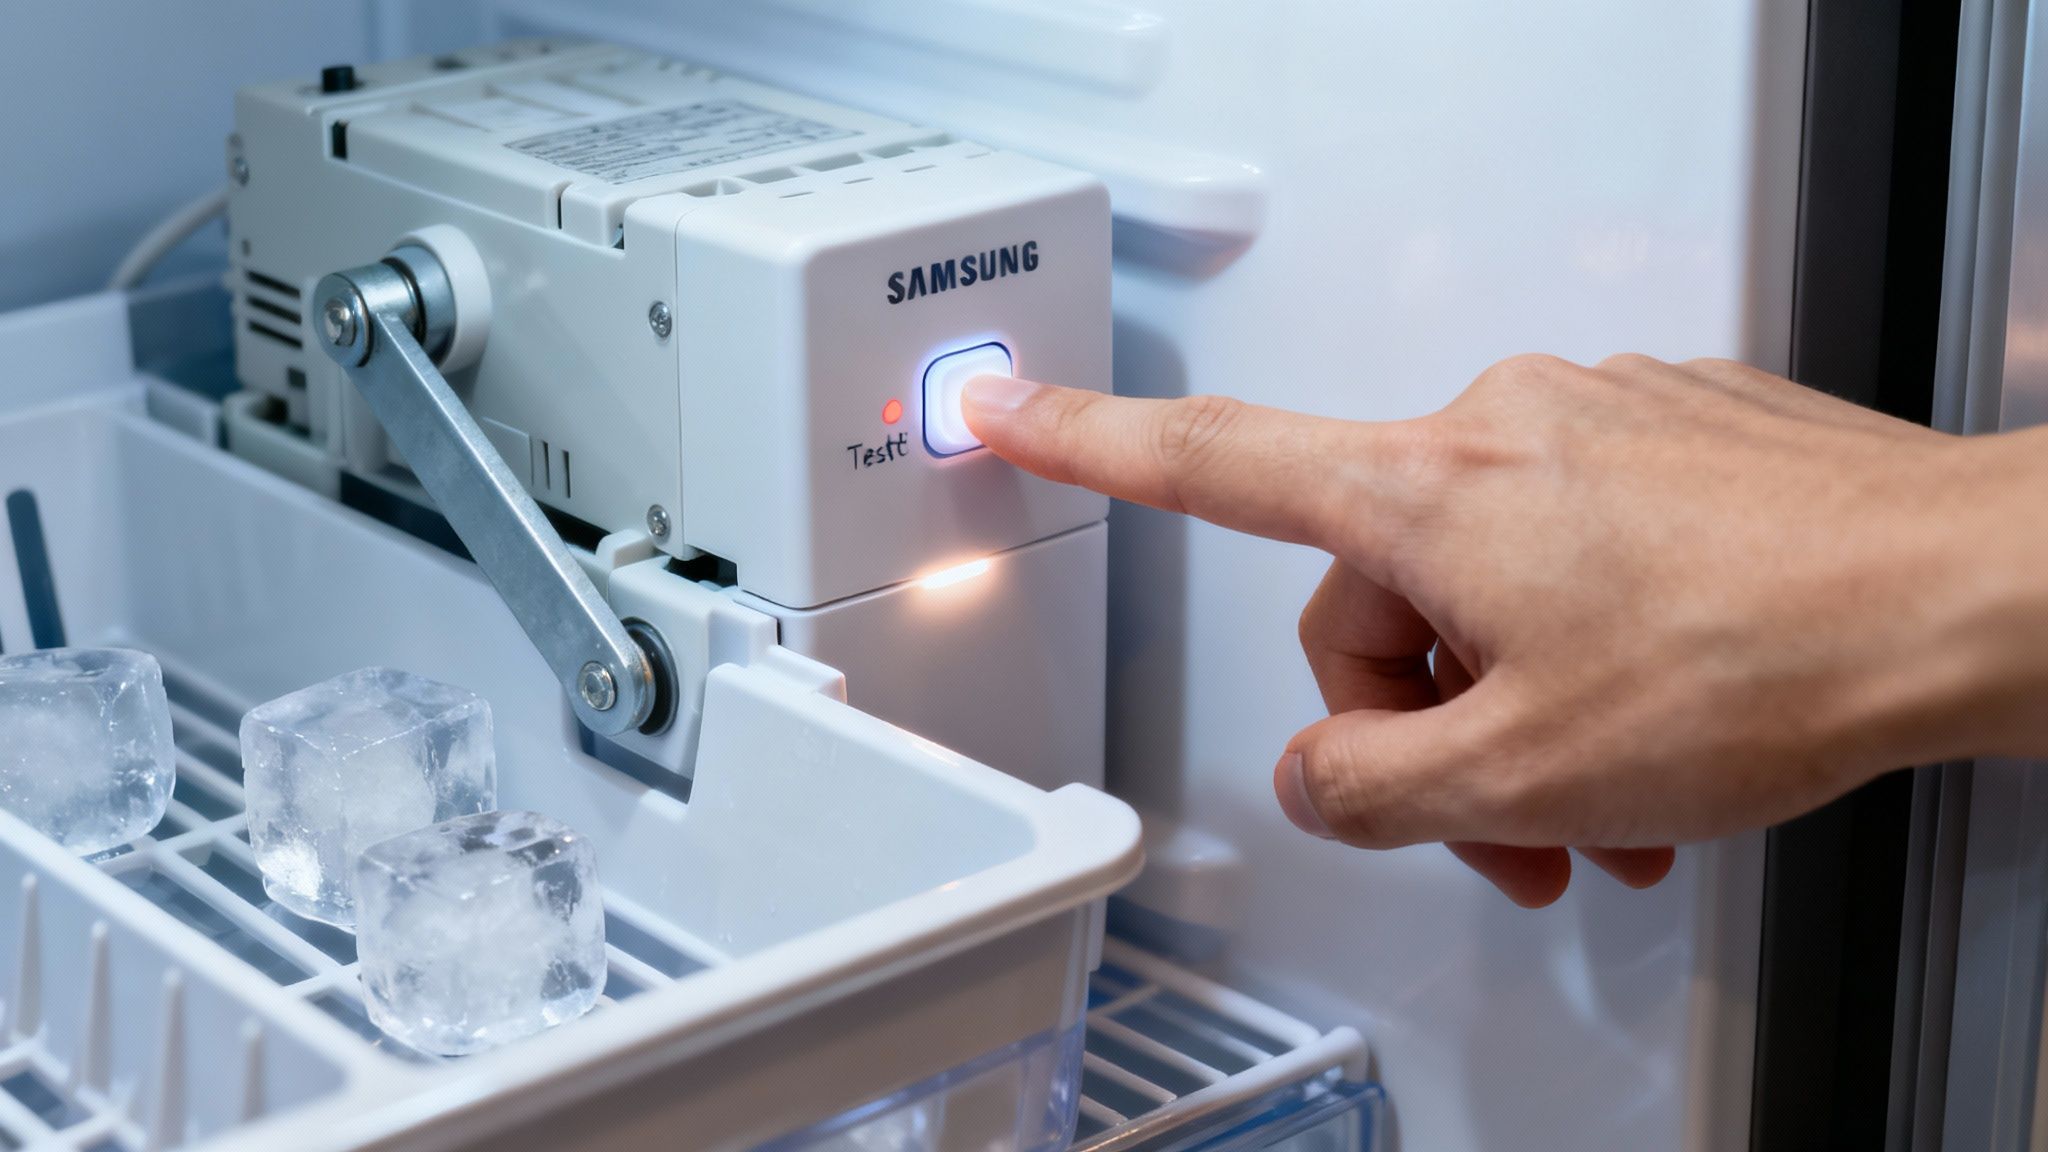
First things first, you need to find the reset button. On most Samsung models, you'll find a small, rectangular button on the side or bottom of the ice maker itself. You’ll probably have to pull the ice bucket out to get a clear view. Once you spot it, press and hold that button for about 5-10 seconds.
Know What to Look and Listen For
When you do this correctly, you'll trigger a forced harvest cycle. This test is your best friend for diagnosing the problem without pulling out any tools. You should hear a clear chime, which tells you the test has started.
Of course, if your entire fridge is having trouble staying cold, a simple ice maker fix won't solve the bigger problem. You might want to read our guide if you find your Samsung fridge is not cooling after a reset.
After the chime, pay close attention. You should hear the motor kick on and see the ejector arms (sometimes called "rakes") slowly rotate to push out any ice in the tray. If this happens, you know the mechanical parts are moving as they should.
Next, listen for the sound of the water inlet valve opening and filling the ice mold. This is the crucial moment that confirms water is actually getting to the unit. If you've been wondering how to repair the ice maker in your Samsung refrigerator, this one test can give you a ton of information fast.
Expert Tip: A successful test cycle is a fantastic sign. If you hear the chime, see the arms move, and hear the water fill the tray, your issue was probably just a temporary glitch. Let the unit run for a full 24 hours to see if it starts making ice normally.
For those of us in areas like McKinney and Celina, running this quick test after a power flicker can often solve the problem immediately.
But what if the cycle doesn't work as described? That's diagnostic information, too. By noting where the process fails, you can start to pinpoint whether you have a bad motor, a clogged water line, or a faulty water valve.
Interpreting Ice Maker Test Cycle Sounds and Actions
To help you figure out what's happening during the test, here's a quick guide to what the different sounds and movements mean.
| Action/Sound | What It Means If It Happens | What It Means If It Doesn't Happen |
|---|---|---|
| Chime sounds | The control board has power and is responding to the reset command. | Possible issue with the control board or a power supply problem. |
| Motor whirs, ejector arms rotate | The motor is working, and there are no physical obstructions. | The motor has likely failed, or something is jamming the arms. |
| Sound of water filling the tray | The water inlet valve is opening and the water line is clear. | The water line could be frozen, the valve is faulty, or water pressure is too low. |
| Entire cycle completes | All major components are functioning correctly. The issue was likely a software glitch. | A component failed during the test, pinpointing the source of the problem. |
Using this table, you can turn a failed test from a frustration into a solid lead on what needs to be fixed next.
Getting Your Ice Maker Settings Just Right
So you've done a reset or a small fix, but the ice production still isn't what you expect. Don't worry, this is pretty common. The next step is to dial in your refrigerator's settings to create the perfect environment for that ice maker to do its job properly.
The absolute most important setting is your freezer's temperature. For the ice maker's internal thermostat to kick off a harvest cycle, your Samsung freezer needs to be a steady 0°F (-18°C). If it's even a few degrees warmer, the whole process can slow to a crawl or just stop altogether.
Next up, let's look at the water supply. It sounds obvious, but you’d be surprised how often the main water valve behind the fridge isn't fully open. A partially closed valve means weak water flow, which is why you end up with those small, hollow, or just plain weird-looking ice cubes.
Fine-Tuning Water Flow and Ice Detection
For folks in areas with a lot of new construction, like Celina, sometimes the municipal water pressure can be inconsistent. That makes having good flow on your end even more critical.
A clogged water filter is another classic culprit. If you can't remember the last time you changed it—or if it's been over six months—now's the time. A fresh filter can make a world of difference.
Under normal circumstances, your Samsung ice maker should be cranking out about 120 cubes per day. If you're not seeing that kind of output, these small tweaks are usually all it takes to get things back on track. For a deeper dive, you can always learn more about Samsung's official ice maker guidelines.
Quick Tip: Here's a simple one I see all the time with families in North Dallas. Make sure the ice bucket is pushed all the way in until it clicks. If it's not seated properly, it can block the sensor arm and fool the ice maker into thinking the bin is full, shutting down production.
Knowing When to Call a Repair Professional in Plano
Tackling a DIY repair is a fantastic way to save a few bucks and get to know your refrigerator better, but the smartest DIY-ers know when to throw in the towel. Sometimes, the problem is deeper than a simple part swap, and trying to force a fix can lead to even bigger, more expensive headaches. If you've gone through all the troubleshooting steps and that ice bin is still empty, it’s probably time to bring in an expert.
Some issues are immediate red flags that scream "stop now!" If you catch a whiff of a chemical smell, you could be dealing with a refrigerant leak—that's not something you want to mess with. The same goes for any persistent electrical problems, like fuses that keep blowing or a control panel that's completely dead. These situations require specialized tools and the kind of training only a licensed technician has.
Telltale Signs You Need an Expert in the Plano Area
Is your ice maker making a racket? Loud, strange noises are a major warning sign. A relentless grinding, a loud buzzing, or a constant clicking sound usually points to a failing motor or a stripped gear hidden deep inside the unit. Continuing to run the ice maker when it's making these sounds is just asking for a complete system failure.
Your time is valuable. A DIY fix might feel cheaper upfront, but after a few failed attempts, the costs of parts and your own frustration start to add up. A professional gets it done right the first time, usually in a single visit, protecting your appliance and getting your life back to normal.
For those more complex problems, homeowners in Plano, Frisco, and across North Dallas should lean on professional experience. A seasoned technician can quickly pinpoint the real culprit, whether it’s a faulty main control board or a tricky sensor malfunction that you’d never find on your own.
To get a definitive diagnosis and quality service, you can find more information about professional refrigerator repair in Plano, Texas. It's just not worth risking your entire refrigerator to save a little on what seems like a small repair.
If you're dealing with a stubborn Samsung ice maker in Allen, Plano, Frisco, or McKinney, get a fast and reliable solution from ThumbUp.Pro. Our certified technicians can tackle even the toughest repairs, guaranteeing your appliance is fixed correctly the first time. Book your appointment online at https://thumbup.pro and get $20 off your service.