Before you even think about taking your dryer apart, let's talk about tools. Honestly, having the right gear on hand is half the battle. It's what separates a quick, satisfying fix from a frustrating afternoon that ends with a call to a pro anyway.
The good news? You don't need a professional workshop. Most common dryer problems can be solved with a handful of tools you might already have in your garage.
Your Essential Dryer Troubleshooting Toolkit for Allen, TX Homes
Gathering your tools before you start is probably the single most important step. A little prep work here means you won't be scrambling mid-repair. For anyone in Plano or Allen, having this basic kit means you can tackle a surprising number of issues on your own.
Think of it as your go-to appliance repair kit. These aren't just for your dryer; you'll find yourself reaching for them for all sorts of projects around the house. They're a solid investment.
Must-Have Diagnostic and Repair Tools
Using the right tool for the job prevents simple mistakes, like scratching your dryer's paint job with a screwdriver when a putty knife would have worked perfectly. More importantly, it lets you test parts accurately instead of just guessing what’s broken and throwing money at the problem.
Here’s what you absolutely need in your corner:
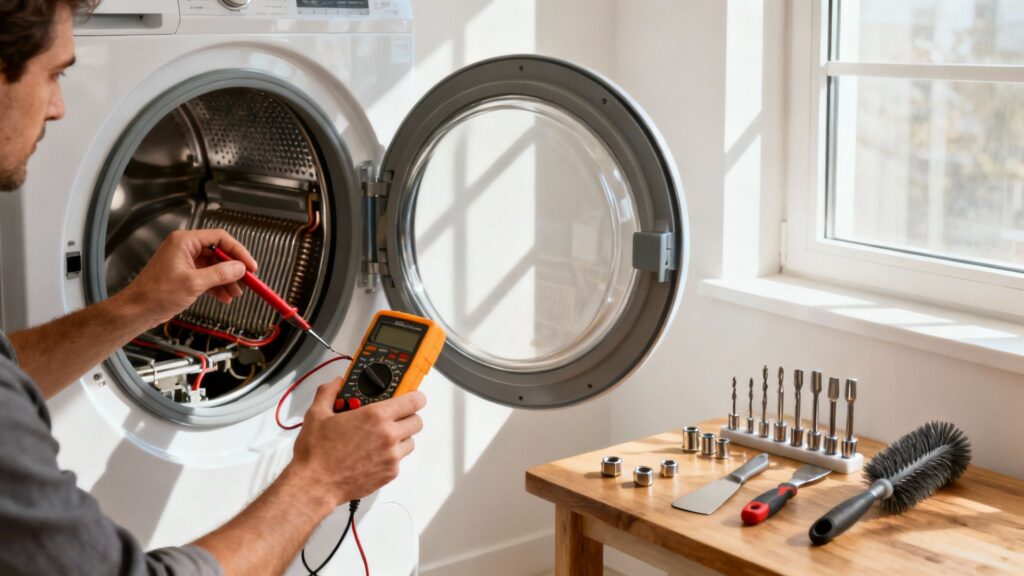
- Multimeter: This is your MVP for any electrical dryer repair. It's the only way to safely check for continuity and see if parts like the thermal fuse, heating element, or thermostats have actually failed. It takes the guesswork out of the equation.
- Nut Driver Set: So many of the screws inside a dryer have hex heads. A set of nut drivers, especially the common 1/4-inch and 5/16-inch sizes, gives you a much better grip than a clunky wrench and prevents you from stripping screw heads.
- Putty Knife: This is the secret weapon for popping the top or front panel off most dryers without leaving a mark. Just slide it into the seam between panels and give it a gentle twist to release the hidden clips.
- Screwdrivers: No surprise here. A good set with various Phillips and flathead sizes will handle all the standard screws you'll come across.
Tools for Safety and Maintenance in McKinney & Celina
Fixing what's broken is one thing, but preventing problems in the first place is even better. This is especially true for homeowners in McKinney and Celina, where dust and lint can become a real fire hazard if left unchecked.
A clogged dryer vent is one of the leading causes of house fires. That flexible vent brush isn't just a repair tool—it's a critical piece of safety equipment every home should have.
A flexible dryer vent brush is non-negotiable. You need one. This long, snake-like brush is the only way to properly clean out the entire vent line, all the way from the back of the dryer to the outlet outside. Get all that flammable lint out of there.
When you use the brush along with a powerful shop vacuum, you're ensuring your dryer can actually breathe. This not only makes it run more efficiently (and dry your clothes faster) but also dramatically cuts down on the risk of a fire.
Diagnosing Common Dryer Problems in Frisco Homes
When your dryer gives up the ghost, the laundry pile seems to grow by the minute. For busy families in Frisco and McKinney, that’s not just a small hassle—it’s a major roadblock in your week. The first instinct might be to panic, but the best approach is to think like a detective. A little systematic troubleshooting can help you zero in on the problem, potentially saving you a lot of time and money.
Instead of just guessing what's wrong, let's walk through a clear diagnostic path for the most common dryer headaches. A machine that’s completely dead, for instance, needs a different line of questioning than one that tumbles but leaves your clothes sopping wet. By isolating the symptoms, you can narrow down the list of suspects and focus your efforts where they’ll count.
The Dryer Is Completely Silent
You've loaded it up, pushed the start button, and… crickets. No hum, no click, not even a whisper. This is a classic dryer problem, and thankfully, the fix is often much simpler than you'd think. Before you assume the worst, always start with the basics.
- Check the Power Source: This might sound too obvious, but is the dryer plugged in all the way? Cords get knocked loose. If the plug is secure, head over to your circuit breaker panel. Find the breaker for the dryer—it's usually a big, double-pole one—and flip it completely off, then firmly back on. Breakers can sometimes trip without looking like they have.
- Test the Door Switch: This little plastic switch is the gatekeeper that tells the dryer it's safe to start. If it fails, the machine won't do a thing. You can often hear a faint "click" when you close the door. No click? The switch might be broken. The only way to know for sure is to test it for continuity with a multimeter.
- Inspect the Thermal Fuse: Think of the thermal fuse as a safety hero. It's designed to blow and cut all power if the dryer overheats, preventing a potential fire. The number one cause of overheating? A clogged vent. If this fuse blows, your dryer will be completely unresponsive. It's a cheap and easy part to replace, but you must fix the underlying overheating issue, or the new one will just blow again.
The Dryer Tumbles But Produces No Heat
This one is incredibly frustrating. The dryer seems to be working perfectly—it spins away, the timer counts down—but your clothes come out just as damp as they went in. This almost always points to a breakdown somewhere in the heating system.
If this is what you're dealing with, we have a complete guide dedicated to troubleshooting a dryer that's not heating that dives much deeper into the specific components.
Here’s a quick overview to get you started on the right track before you dive into a full repair.
Quick Dryer Troubleshooting Guide for North Dallas
This table breaks down the most common symptoms we see, giving you a starting point for your diagnosis.
| Symptom | Potential Cause | First Diagnostic Step |
|---|---|---|
| Dryer won't start | No power, faulty door switch, blown thermal fuse | Check the circuit breaker and outlet, then listen for the door switch "click" |
| Dryer runs but no heat | Burnt-out heating element, faulty high-limit thermostat | Unplug the dryer and visually inspect the heating element coil for breaks |
| Dryer gets too hot | Clogged vent, faulty cycling thermostat | Clean the entire vent line, from the dryer to the outside of your house |
| Loud squealing/grinding | Worn drum rollers, idler pulley, or belt | Listen closely to pinpoint the noise's origin while the drum is turning |
This table is your first line of defense, helping you quickly identify the most likely culprit based on what your dryer is (or isn't) doing.
Pro Tip: When an electric dryer isn't heating, the heating element is the prime suspect about 80% of the time. These metal coils glow red hot, and just like an old lightbulb filament, they can burn out. A quick visual inspection often reveals a visible break in the coil.
This simple flowchart is a great mental model for how to start any dryer diagnosis.

It really just reinforces the golden rule of appliance repair: always check the simple stuff first. Power and airflow are the foundation.
Understanding Other Common Issues
While "no start" and "no heat" are the calls we get most often from homeowners in Celina and North Dallas, other problems can definitely crop up. A loud, rhythmic thumping or high-pitched squealing often points to worn-out drum support rollers or a failing idler pulley, which is the part that keeps the drive belt tight.
What if the dryer runs but shuts off way too soon? That could be a bad cycling thermostat, which is in charge of regulating the temperature inside the drum. Every strange sound and symptom is a clue. If you listen carefully and observe exactly how the dryer is misbehaving, you can confidently track down the broken part and get your laundry routine back on track.
Your Practical Guide to Replacing Key Dryer Components
So, you've done the detective work and found the part that's causing all the trouble. Now it’s time to roll up your sleeves and get it swapped out. It might sound a little intimidating, but trust me, replacing common culprits like the thermal fuse, heating element, or drive belt is a very manageable job. With a little patience, you'll have your dryer running like new in no time.
Think of this as me, an experienced tech from Allen, looking over your shoulder and walking you through it. We'll cover everything from safely unplugging the machine to tightening that very last screw, all in plain English.
Installing a New Thermal Fuse
A dryer that won't start at all? A blown thermal fuse is one of the most common reasons I see. It's a tiny, cheap part, but it's a critical safety device that cuts power if things get too hot. Thankfully, replacing it is usually a quick fix.
First thing's first, and this is non-negotiable: unplug your dryer from the wall. Never, ever work on an appliance that’s still juiced. You'll typically find the thermal fuse on the back panel, often near the blower housing. A few screws are all that stand between you and accessing it.
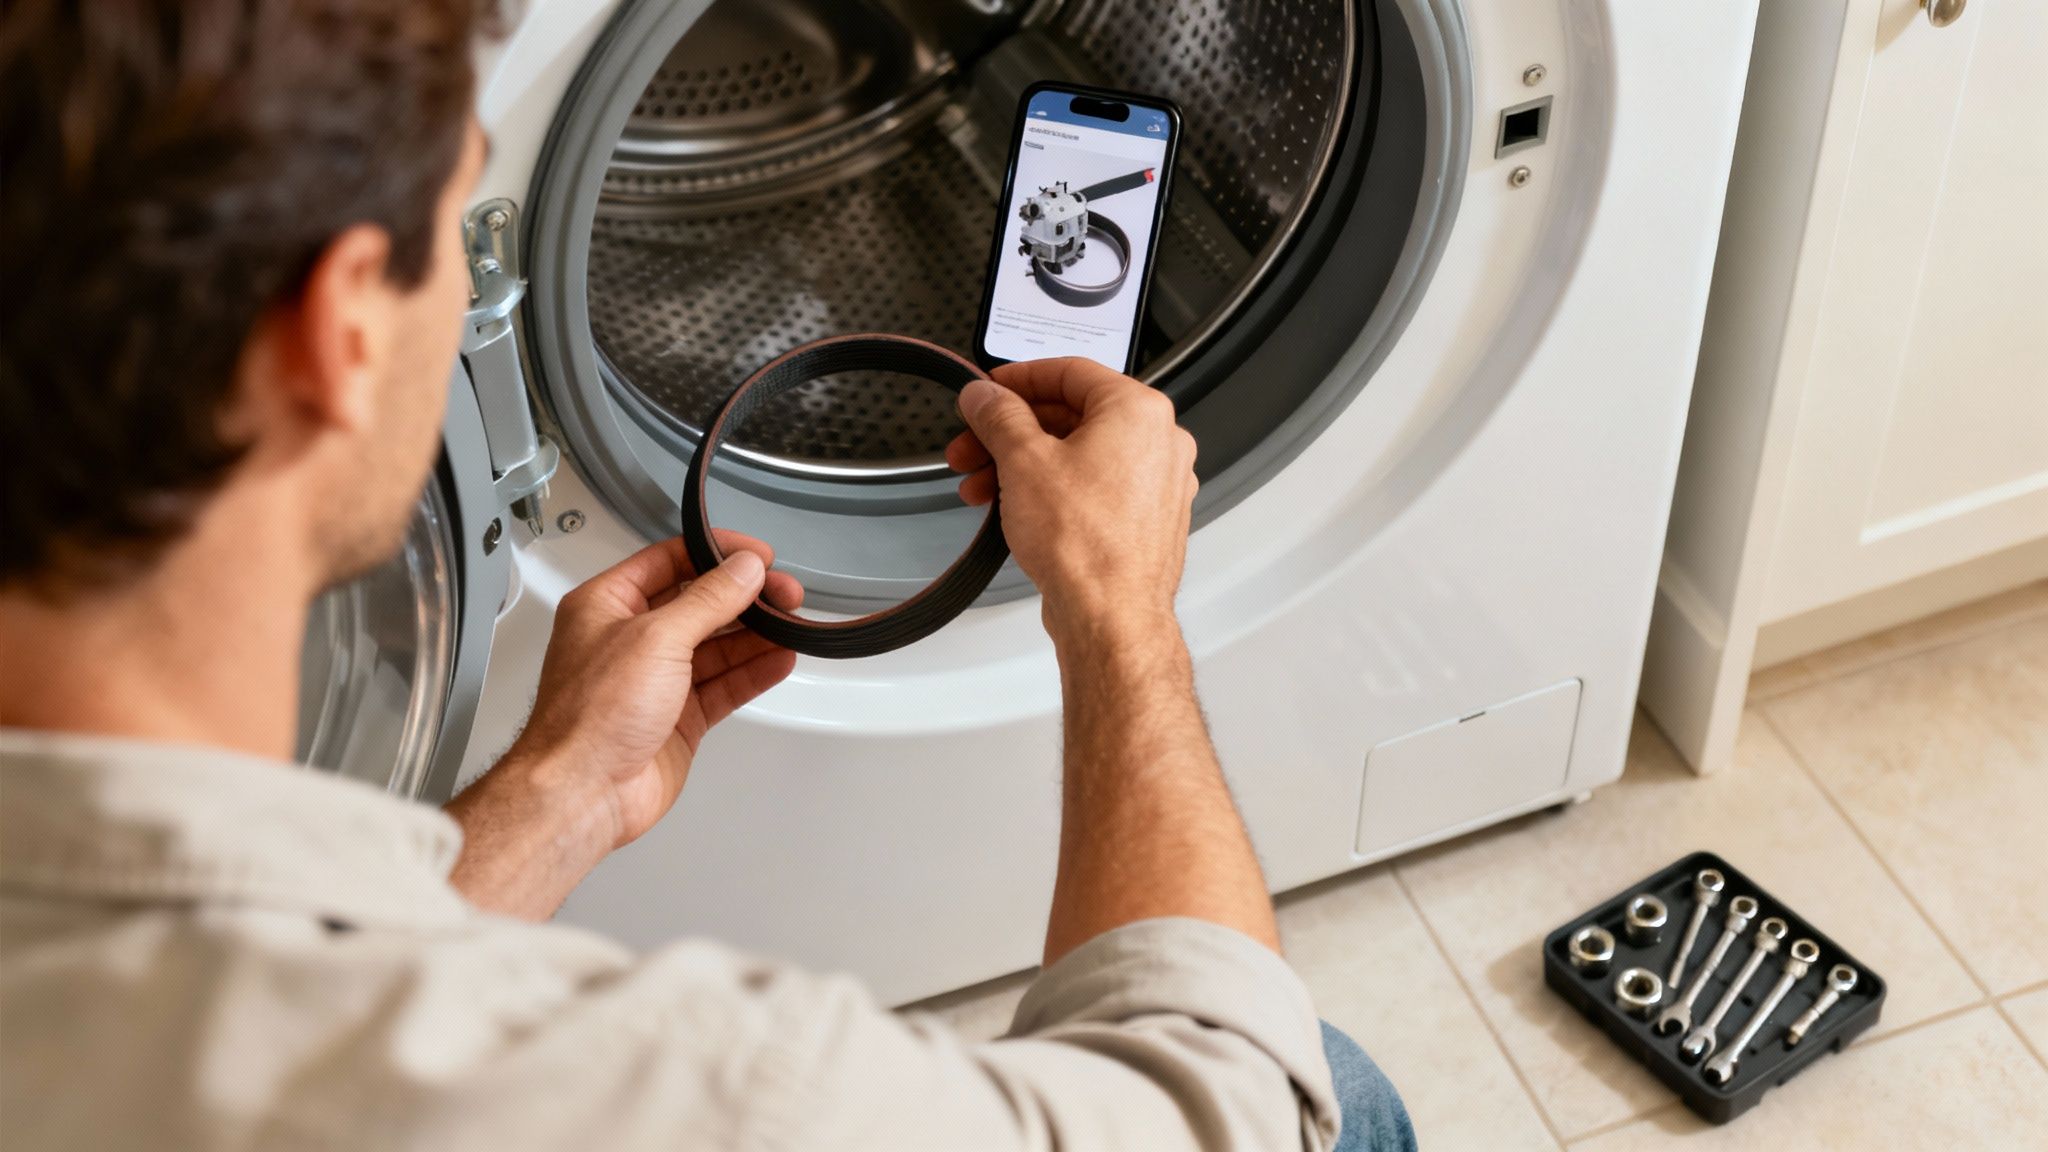
Pro Tip: Before you pull a single wire off the old fuse, grab your phone and snap a quick picture. This little trick is a lifesaver and gives you a perfect roadmap for connecting the new part correctly.
The fuse itself is usually held in place with just a screw or two. After you've swapped it out, remember this: a blown fuse is just a symptom. The real problem is almost always a clogged vent. You must clean out your entire vent line, or you'll just be doing this all over again when the new fuse blows.
Swapping Out the Heating Element
If your dryer is tumbling away but the clothes are coming out just as damp as they went in, a burnt-out heating element is your prime suspect. This part is basically a big coil of wire that glows red-hot to create heat, and like any hardworking component, it can eventually break.
To get to the element, you'll usually have to remove either the front or back panel of your dryer. Once you've got a clear view of the metal box that holds the element, disconnect the wires leading to it and take out the mounting screws.
The whole heating element assembly should slide right out. Putting the new one in is as simple as doing everything in reverse. Just make sure all your connections are tight and secure before you button up the dryer panels. For any homeowners in Frisco taking this on, know that this single repair can save you a couple of hundred bucks on a service call.
Looping on a New Drive Belt
Hearing a loud, rhythmic thumping? Or is the drum not turning at all? That's the classic sign of a broken or worn-out drive belt. It's another one of those parts that just wears out over time, and it's absolutely something you can replace yourself.
You'll need to open up the dryer cabinet to get to the drum. The trickiest part of this whole job is getting the new belt looped correctly around the drum, the idler pulley, and the motor shaft. It can feel like you need a third hand, but it's doable.
- Idler Pulley: This is a small wheel that creates tension to keep the belt from slipping.
- Motor Shaft: The belt has to grip this little shaft to make the drum spin.
The belt path usually follows a sort of zig-zag or "S" shape around these parts. The idler pulley is spring-loaded, so once you get the belt routed correctly, it will pull everything taut. This one is a bit more hands-on, but it's a daily task for our technicians in McKinney and well within reach for a determined DIYer.
It’s great to see more and more people choosing to repair appliances instead of just buying new ones—it’s a smart move for your wallet and the planet. This trend is a big reason why the household appliance repair services market is projected to hit around $85 billion by 2025 and keep growing through 2033. With the rising cost of new machines and a bigger focus on being sustainable, fixing what you have just makes sense. You can read the full research about appliance repair market trends to see how homeowners are making smarter choices.
Essential Dryer Safety and Maintenance Routines
It’s a fantastic feeling when you get your dryer humming again after a repair. But the real goal is to keep it running safely and efficiently for the long haul. This isn't just about dodging another repair bill; it's about preventing serious hazards, like the thousands of house fires started by clothes dryers every year.
A little preventative maintenance goes a long way in protecting your home and family. Just a few simple habits can dramatically extend your dryer's life and ensure it operates safely—a top priority for any homeowner in North Dallas.
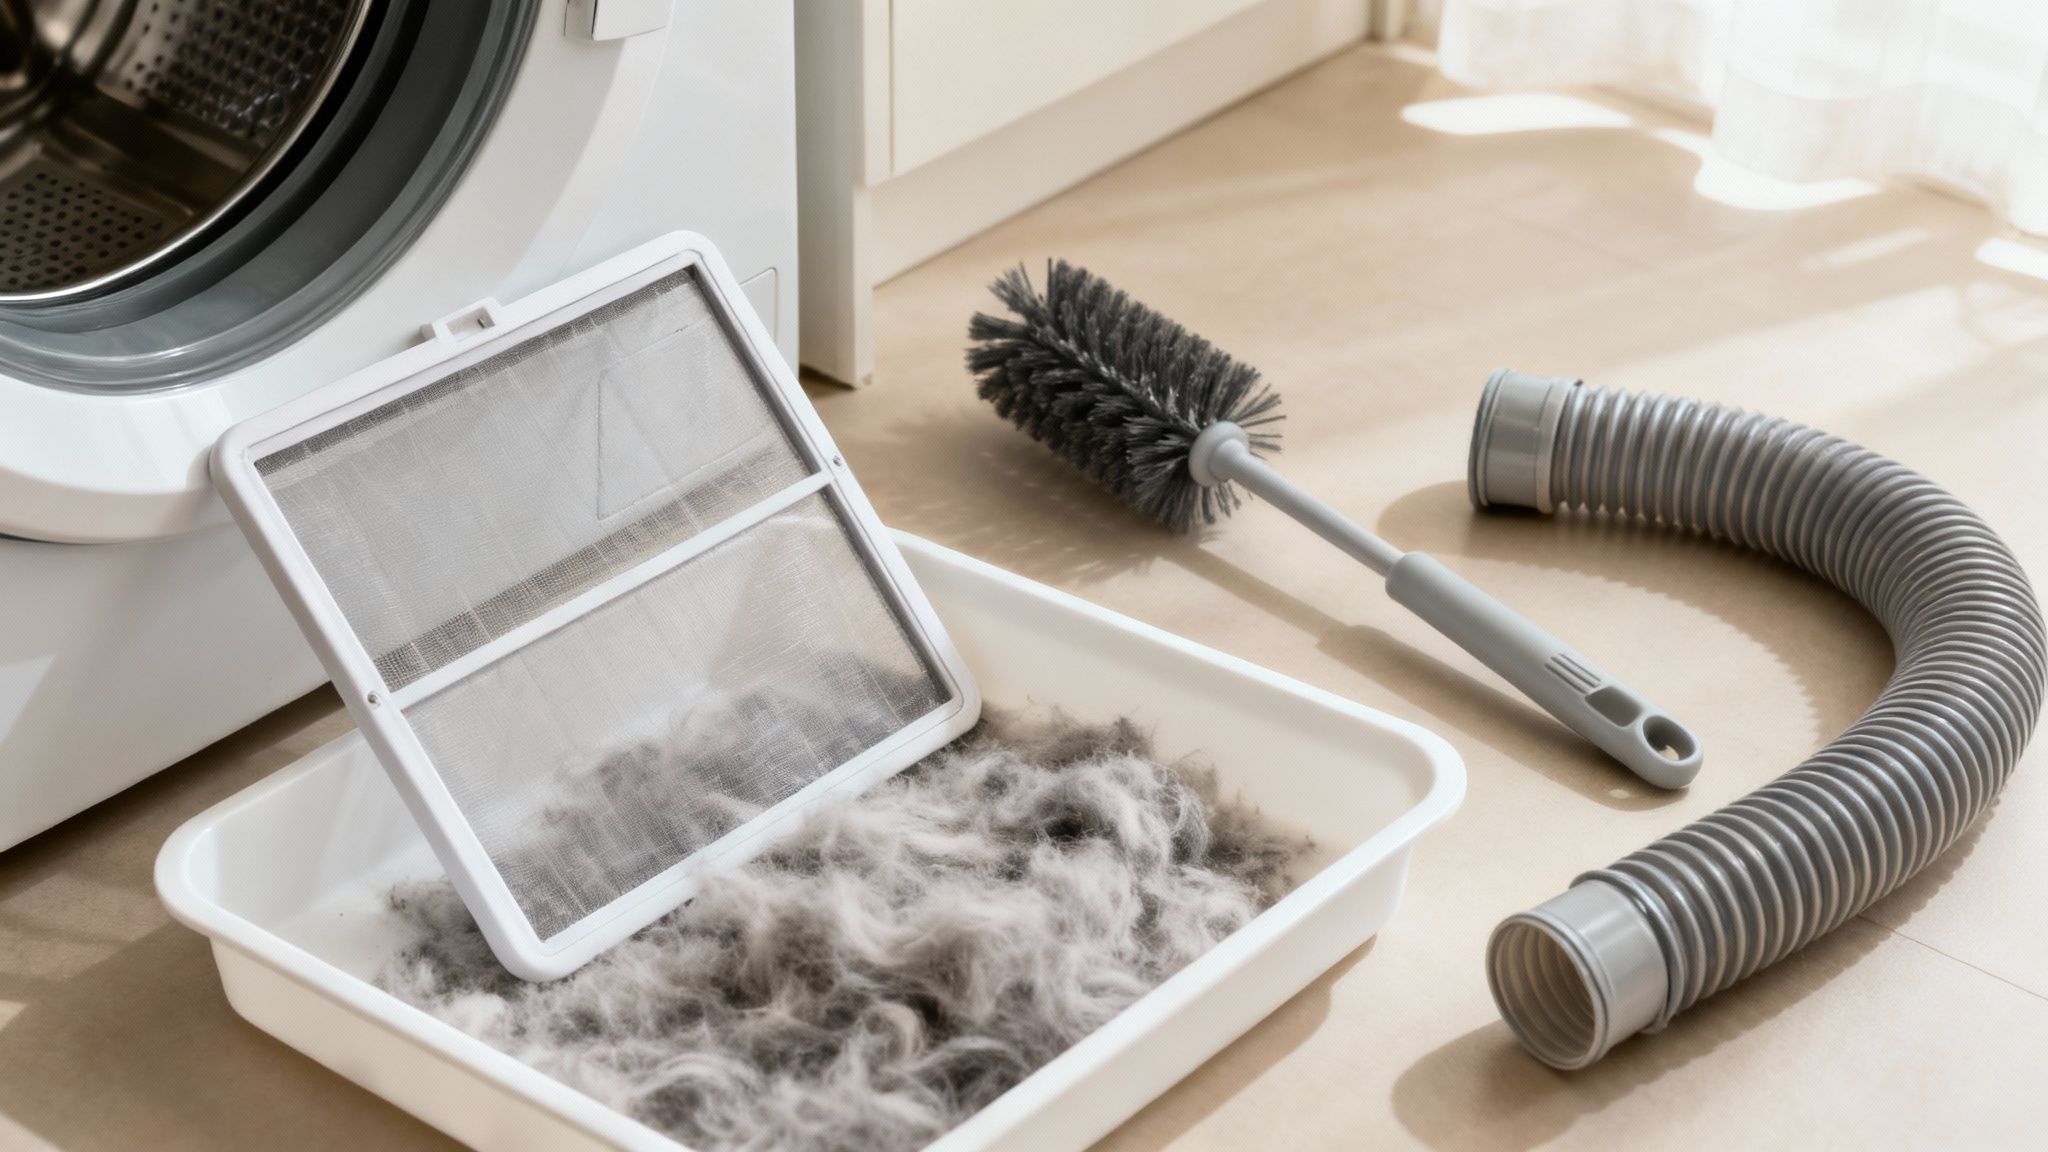
The Most Important Habit: Clean Your Lint Screen
If you do only one thing, make it this. It’s the single most critical maintenance task, and thankfully, it’s also the easiest. You absolutely must clean the lint screen after every single load. I can't stress this enough. Not every few loads, not just when you notice it's full—every single time.
When that screen gets clogged, airflow is choked off, forcing your dryer to run much harder and longer than it should. This doesn't just eat up electricity; it causes the heating element to overheat, creating a very real fire hazard.
A clean lint screen is your first line of defense against dryer fires. It's a simple, two-second habit that makes a massive difference in both safety and performance.
While you've got the screen out, take a look at the housing it slides into. Lint loves to build up in that cavity, so a few times a year, grab a vacuum with a crevice tool and clear it out. Keeping your whole laundry area tidy is a good practice, too. If you're battling other appliance odors, our guide on how to properly clean a smelly washing machine can help keep things fresh.
Deep Cleaning Your Dryer Vent System
That little lint screen doesn't catch everything. A surprising amount of lint and debris gets past it and travels into your dryer vent, where it slowly builds up. For homes in Plano and McKinney, a clogged vent is a huge safety risk and the hidden cause behind many common dryer problems, like blown thermal fuses.
I recommend a full vent cleaning at least once a year. Here's a straightforward way to tackle it:
- Disconnect and Clear: First, unplug the dryer. Carefully pull it away from the wall and disconnect the flexible vent hose from the back of the dryer and the wall duct.
- Use a Vent Brush: Get a long, flexible dryer vent brush and feed it into the ductwork inside the wall. As you push it through, rotate it to break up all that compacted lint.
- Check the Exterior Vent: Head outside and find where your dryer vents. Make sure the little flaps on the cover aren't stuck and clear away any lint that's piled up around the opening.
- Vacuum Everything: Now, use a shop vacuum to suck out all the loosened lint from both ends of the duct. Don't forget to vacuum out the exhaust port on the back of the dryer itself.
If you notice your clothes are taking forever to dry or the top of your dryer is hot to the touch, those are big red flags. It means you likely have a dangerous clog. Don't put it off—clean that vent immediately. For anyone in the Celina area, keeping this pathway clear is non-negotiable for a safe home.
When to Call a Dryer Repair Pro in North Dallas
Let's be honest, successfully fixing your own dryer feels great. But knowing when to step back and call in a professional is just as important—if not more so. Some problems go way beyond a simple part swap and get into territory where you really need an expert for safety's sake. Knowing where to draw that line protects you, your home, and your wallet from a repair job gone wrong.
The absolute biggest red flag is the smell of gas coming from your gas dryer. If you catch even a faint whiff of that rotten egg smell, stop what you're doing immediately. Don't unplug anything or flip any switches. Get everyone out, call your gas company's emergency line from outside, and only then should you call a certified technician to handle the appliance.
When a Repair Becomes a Hazard
Electrical problems are another area where you need to be extremely cautious. If you see sparks, smell something burning from the back of the dryer, or the circuit breaker trips the second you try to turn it on, it's time to put down the tools. These aren't minor glitches; they could signal a major short circuit or a fried control board, which are both complex and dangerous to tackle without professional training.
A botched electrical repair is a serious gamble. You don't just risk frying the appliance for good—you create a very real risk of fire or electric shock. For tricky electrical diagnostics in Allen or Plano, getting a pro to look at it is always the safest move.
Making the Smart Call
Sometimes, the problem is just plain stubborn. You've followed the guides, replaced a part you were sure was the culprit, and… nothing. The dryer still won't heat, or now it's making a horrible grinding noise you can't diagnose. At this point, continuing to troubleshoot can easily lead to breaking something else and a much bigger repair bill.
The growing complexity of modern appliances has led to a major increase in the global market for professional dryer repair and refurbishment. It's no surprise that more homeowners are choosing to rely on skilled technicians to get the job done right. You can find more data on the expanding dryer repair service market on archivemarketresearch.com.
If you’re in the North Dallas area and need a hand, our team provides trusted appliance repair services in Plano, Texas and the neighboring communities.
Got Questions? Let's Talk Dryer Repair in Allen and Plano
Even with the best guide, you're bound to have a few questions. That's perfectly normal, especially when you're standing in front of your broken dryer trying to figure out if you should grab your toolbox or your phone. We get calls from folks all over Allen and Plano asking these same things, so let's clear the air.
Think of this as a chat with a seasoned pro, covering those last few details that will help you make the right call. We'll talk money, parts, and that big question: is it even worth fixing?
DIY vs. Professional Repair Costs
Let's get right to it—the cost. This is usually the number one thing people ask. If you're tackling the repair yourself, you're often looking at a surprisingly small bill. A common part like a thermal fuse or a new belt can set you back just $20 to $50. You're just paying for the part, after all.
Now, calling in a professional in the North Dallas area is a different story. You'll have a service call fee, plus the cost for parts and the technician's time. All in, you can expect the final bill to be somewhere between $150 and $400, depending on what’s actually wrong. While DIY is the clear winner for your wallet upfront, a pro gives you peace of mind that the job is done right, potentially saving you from a bigger, more expensive headache later.
Using Generic vs. OEM Parts
"Can I just use a cheaper, generic part?" I hear this one all the time. The short answer is yes, you can. It might save you a few bucks. But from my experience, it's a gamble I wouldn't recommend.
We always suggest using Original Equipment Manufacturer (OEM) parts. These are the parts made by the same company that built your dryer. They're designed to fit perfectly and work exactly as intended. Generic parts can be a hair off in size or made from lower-quality materials, which can cause them to fail early or, worse, damage other components in your machine. If you want a fix that lasts, stick with OEM.
Is Your Dryer Beyond Repair?
Sometimes, you have to know when to call it quits. So, when is a dryer officially a goner? Here are a few signs it’s time to start shopping for a new one:
- The repair estimate is more than 50% of the cost of a new, comparable dryer.
- You're looking at a catastrophic failure, like a cracked drum or a seized motor. These are huge, expensive jobs.
- Your dryer is getting up there in age—over 10-12 years old—and this isn't its first rodeo with repairs.
Professional Vent Servicing in Frisco and McKinney
If you live in Frisco, McKinney, or the surrounding areas, we can't stress this enough: get your vents cleaned by a professional every one to two years. Cleaning out the lint trap is one thing, but the deep, compacted gunk that builds up in the vent line requires special tools. A pro can get it all out, which is a massive win for both your dryer's efficiency and your home's safety.
It's interesting to see how the appliance repair industry is bouncing back. After a bit of a dip, revenue hit $6.3 billion in 2023. It seems more and more people are realizing it's smarter to fix what you have instead of rushing out to buy new. With appliance prices on the rise, knowing a thing or two about dryer repair is a skill that really pays off. You can discover more insights about appliance repair industry statistics on consumeraffairs.com.
When a repair feels like it's over your head or you just want a guaranteed fix from a local expert you can trust, ThumbUp.Pro is ready to help. We provide fast, reliable appliance repair across North Dallas, including Allen, Plano, Frisco, Celina, and McKinney. Our certified technicians will give you upfront pricing and make sure the job is done right the first time. Book online or give us a call for same-day service.